Lecture 1
2016 -2017
Maha alani
1
Introduction:
Microsoft PowerPoint is widely used for making
professional quality presentations in a variety of
formats, including on-screen computer slide
shows, black-and-white or color overheads, and
35mm slides. You can also use it for speaker's
notes and audience hand-outs.
Basic tasks for creating a PowerPoint presentation:
1. PowerPoint can be used as a drawing package for preparing pictures,
forms, posters and leaflets.
2. PowerPoint presentations work like slide shows. To convey a
message or a story, you break it down into slides. Think of each slide
as a blank canvas for the pictures, words, and shapes that will help
you build your story.
Starting Microsoft PowerPoint
To load Microsoft PowerPoint:
1. Click on the Start button and choose All Programs.
2. From the sub-menu choose Microsoft Office 2013. Then PowerPoint
2013.
In the top left corner of the screen is the Quick Access Toolbar which
contains icons to common commands, e.g. save and undo.
Below this is the Ribbon, with tabs along the top. Each tab has a set of icons
which are used to give instructions to PowerPoint called Groups.
Lecture 1
2016 -2017
Maha alani
2
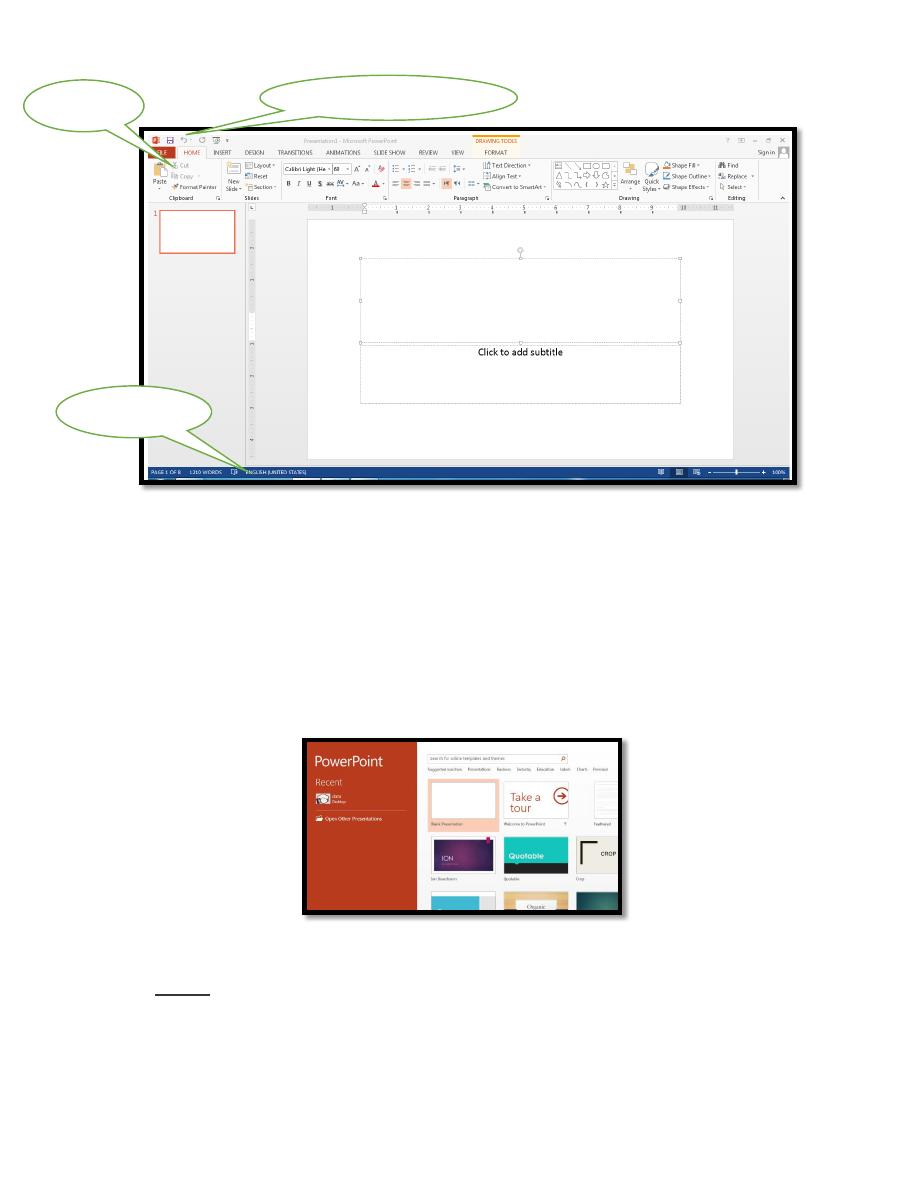
At the very bottom of the window, is the Status Bar. This shows various
information, e.g. which slide you are currently looking at (here you are on
slide 1) and the language you’re working in. On the right-hand side of the
Status Bar are icons to change the view of the slides and to zoom in or out.
Creating a New Presentation
1. Double click to Microsoft PowerPoint 2013 icon.
2. Choose Blank Presentation, Or Choose a theme
When you open PowerPoint, you’ll see some built-in themes and templates.
A theme is a slide design that contains matching colors, fonts, and special
effects like shadows, reflections, and more.
Ribbon
Status Bar
Quick access tool bar
Lecture 1
2016 -2017
Maha alani
3
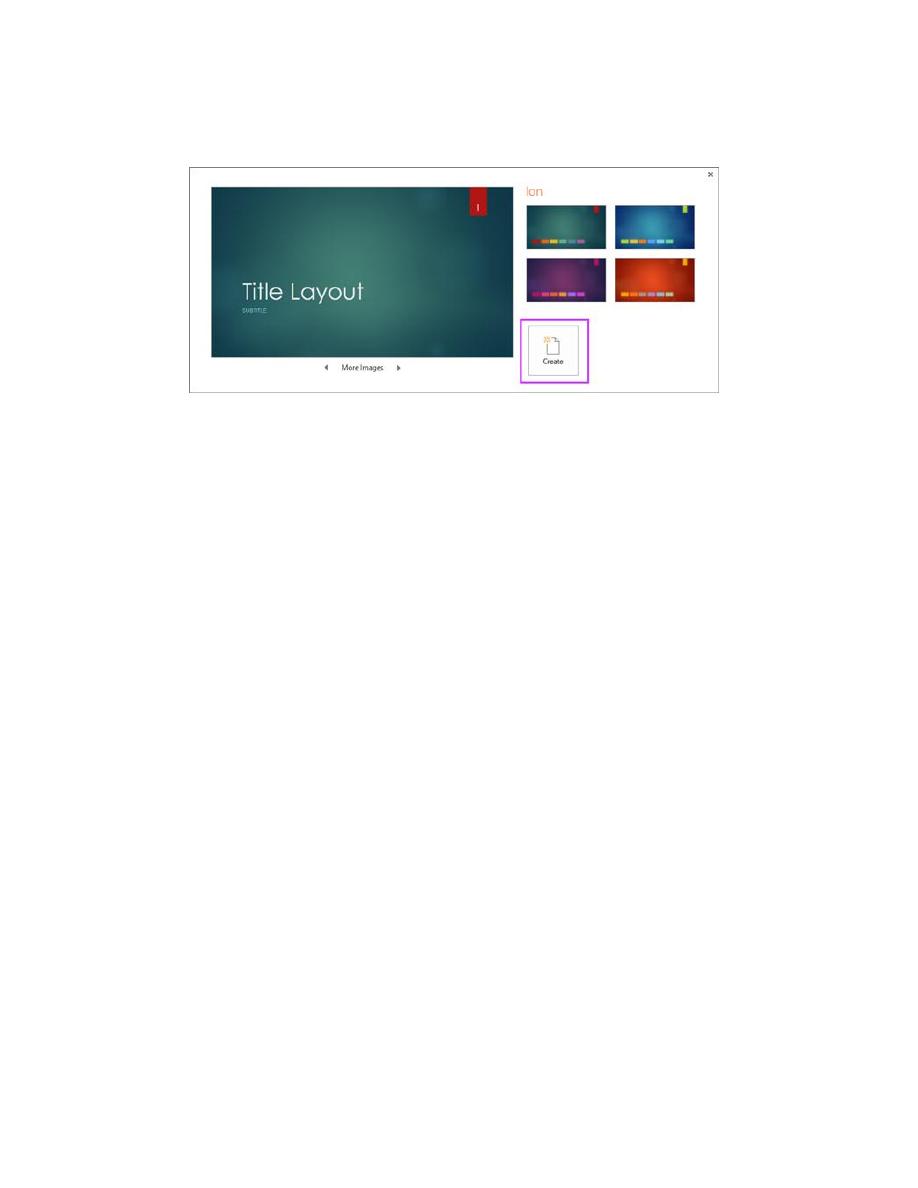
3. Click Create, or pick a color variation and then click Create.
You are ready to enter information onto your first (title) slide. If
necessary, [Maximize] the window to fill the screen. The main part of
the screen is divided into two sections. The main section shows the
current slide, while on the left, slide miniatures appear, allowing you
to see the current slide in its context.
It's important whenever you create a presentation that you give full
consideration to your audience. In particular, don't try to crowd
too much information on each slide and make sure that the text is
big enough to be clearly readable (especially for those with poor
eyesight or similar disabilities).
Entering Text onto the First Slide The first slide has the layout for a
Title Slide (usually you start a presentation with a title slide, though
you don't have to). The layout has two boxes with a dotted frame.
These boxes are called placeholders. Those provided here can contain
text. Instructions on using each type of placeholder appear within its
frame.
4. Click on the first placeholder, add the title to activate the top main title
placeholder and type your text, you can change the font type and the
size between (8 – 96 pt.), and the title is center-aligned in the
placeholder.
Click on the lower placeholder, Click to add subtitle, and type
your text on the screen a bit small to read then increase the
Lecture 1
2016 -2017
Maha alani
4
magnification using the zoom facility in the bottom right-hand corner
of the Status Bar. Use the slider or click on the [Zoom level] (%) button.
5. Saving a Presentation It's a good idea to save your work at regular
intervals whilst you are working on it rather than wait until you have
finished the last slide. For example, you could save every 15 minutes
or after completing each slide.
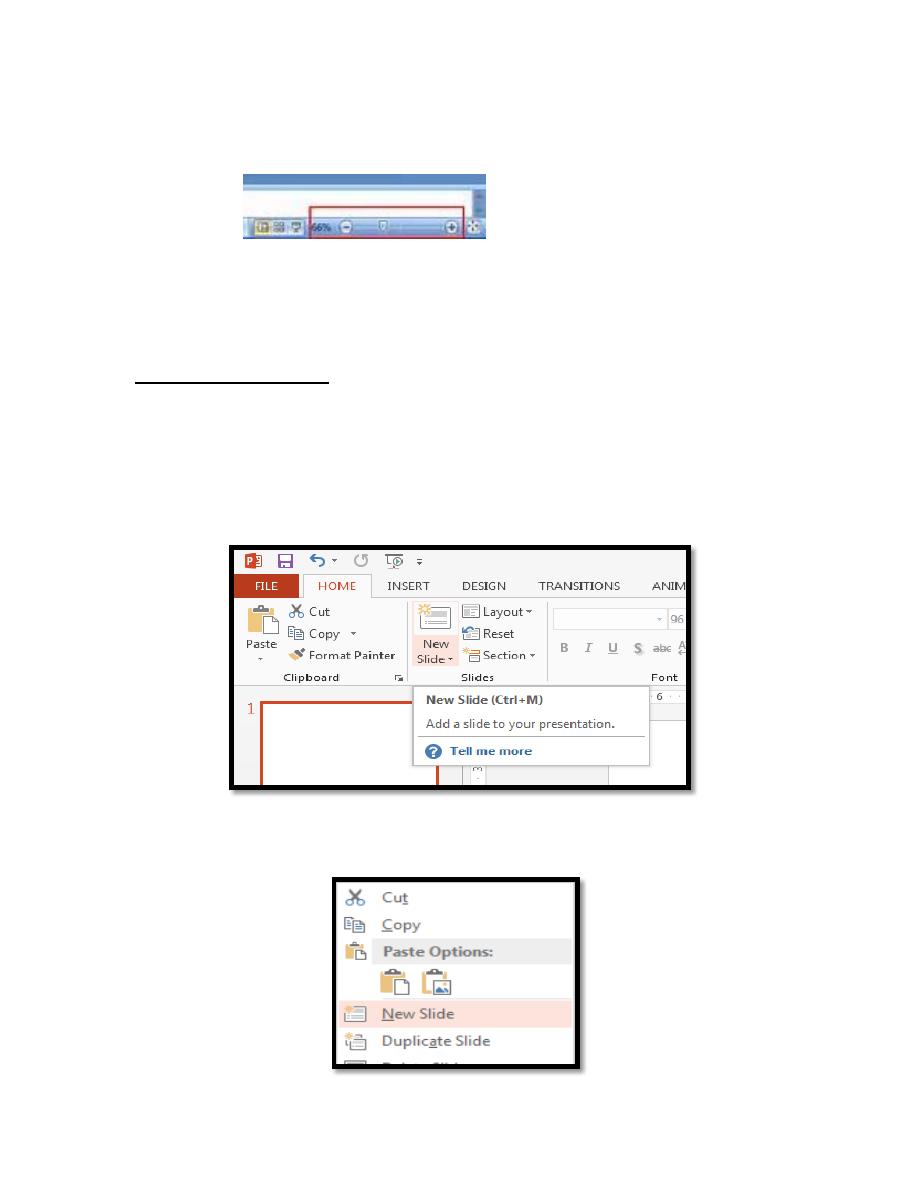
Adding New Slides
To add the next slide:
1. Click on the [New Slide] button on the left of the HOME tab in
the Slides group (click on the icon not on the words New Slide)
Tip: You can jump between placeholders by pressing on the
keyboard; if on the last placeholder it creates a new slide.
2. Or click the right mouse button on the current slide, select New
Slide.
Lecture 1
2016 -2017
Maha alani
5
3. Or by the shortcut keyboard Ctrl + M .
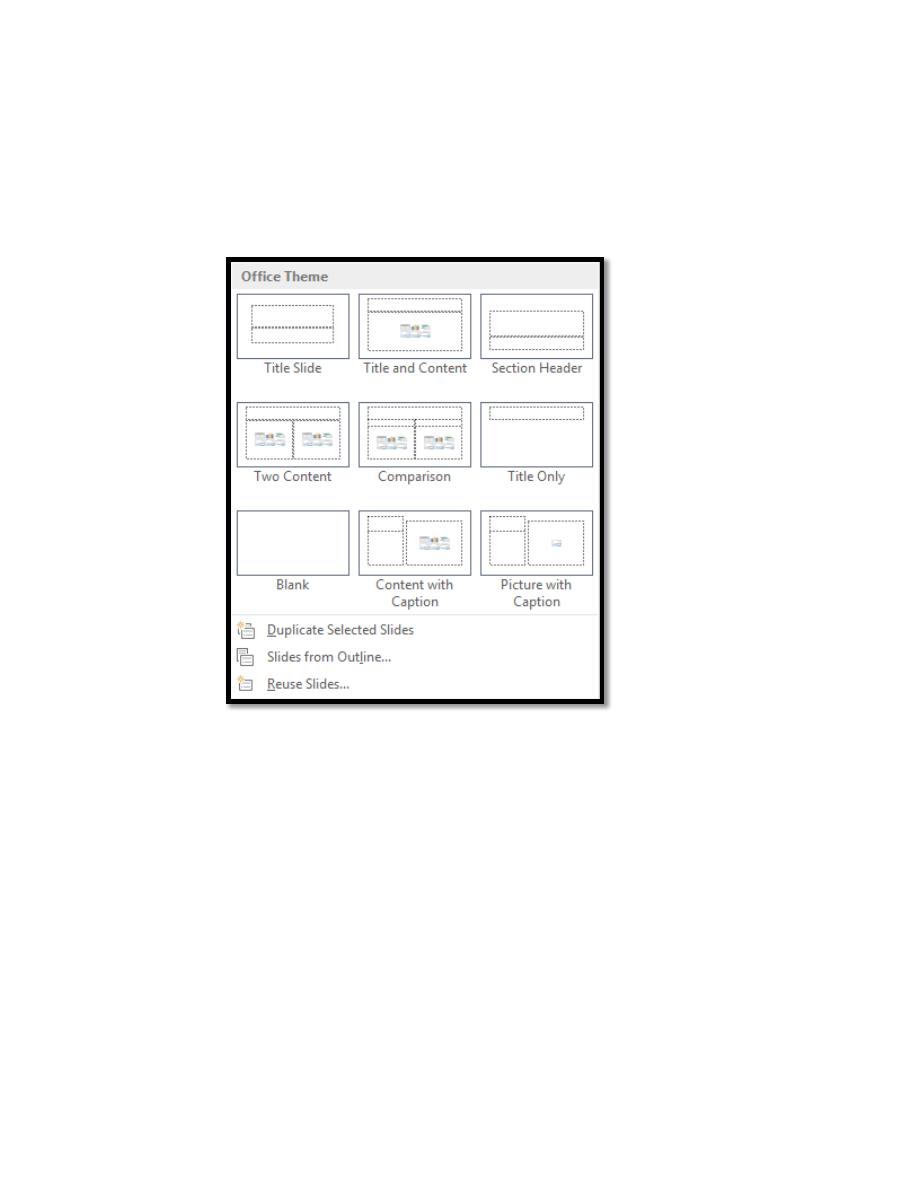
4. A new slide appears in a different slide layout from the first called
Title and Content. There are several different slide layouts
available (which you can get to if you click on the words New Slide
rather than the icon).
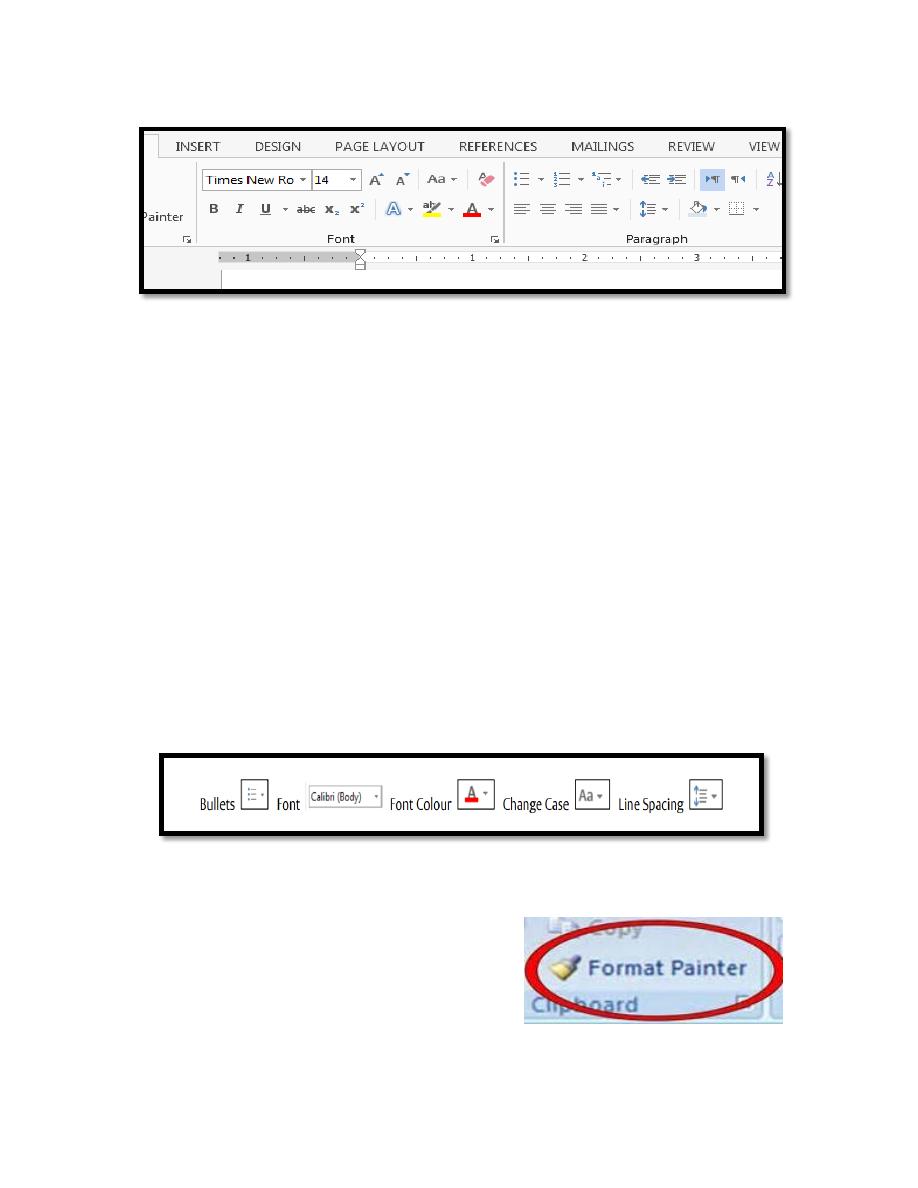
There are a number of ways that you could change the look of your text on
this slide. You could, for example:
Change the bullet point character
Use a different font
Change the font color
Change the case (upper, lower) of the text
Increase or decrease the line spacing between the bullet points
Lecture 1
2016 -2017
Maha alani
6
1. On the HOME tab in the Paragraph group, click on the down arrow
next to the [Bullets] button
2. Choose the bullet character required (e.g. the tick marks or checkmark
bullets)
3. To use a different font: Click on the down arrow next to [Font] button
on the HOME tab, and choose the font you want (e.g. Arial) are best.
4. to change the font color: Click on the down arrow next to [Font Color]
button in the Font group, Click on the square of the color that you want
(or click on More Colors… and select a color from there then press for
[OK])
5. To change the case of the text, eg turn all the letters to UPPERCASE or
to lowercase: Click on the [Change Case] button in the Font group and
choose the case required .
6. to change the line spacing of the bulleted points: Click on the [Line
Spacing] button in the Paragraph group on the HOME tab, Choose the
line spacing required, e.g. 1.5 for one and a half line spacing. To change
the spacing before or after a paragraph.
7. [Format Painter] (The paint brush icon in the Clipboard group on
the left of the Home tab) to copy the
format of one list entry to another (or to
the whole list).
Lecture 1
2016 -2017
Maha alani
7
The advantage of a content layout
is that it will automatically resize a picture to fit within it if the image is too
large, adding a Picture from the Clip Art Gallery This new placeholder has
content icons (in the center) as well as the usual bullet points at the top. These
let you add a Table, Chart, SmartArt, Picture, Online Picture or Video
respectively.
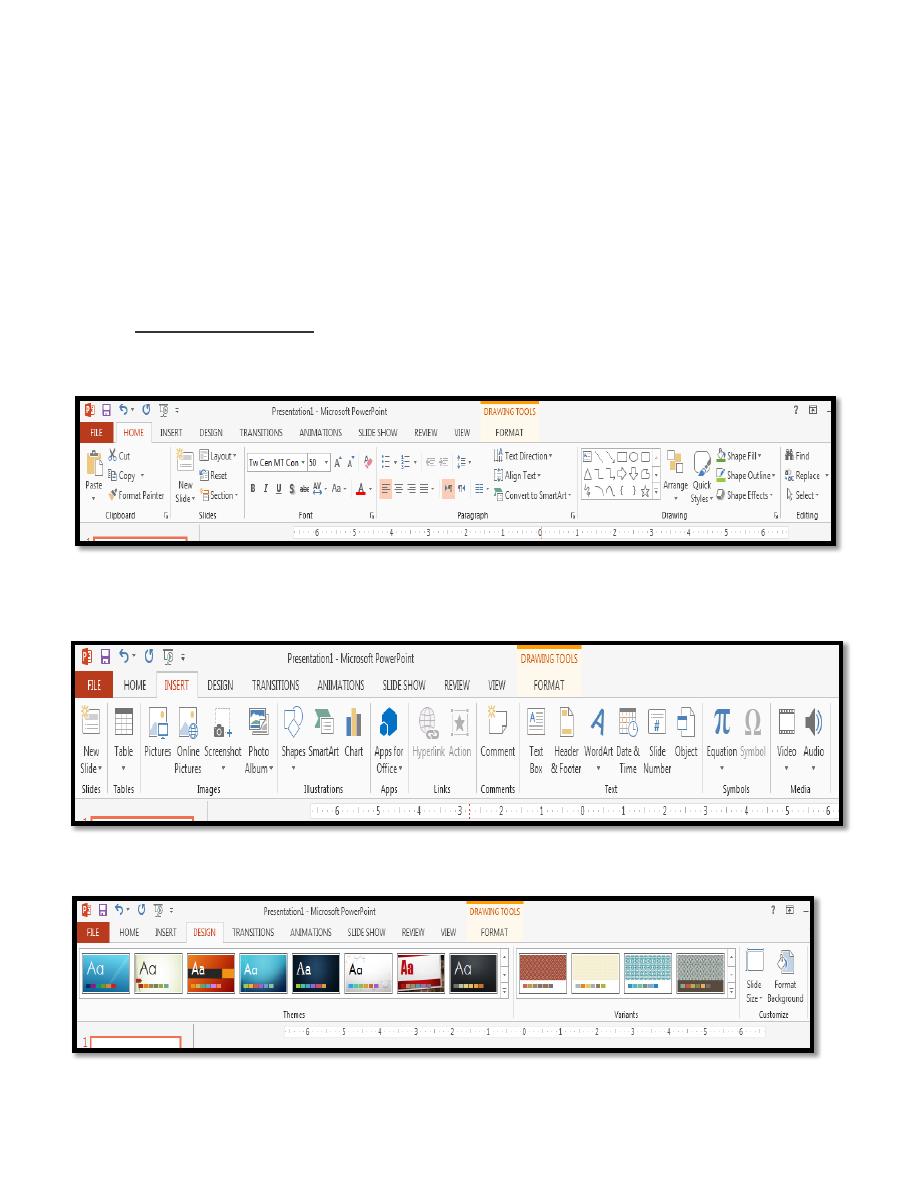
The Ribbon Tabs
1.
HOME Tab contents in ribbon
2. INSERT Tab contents in ribbon
3. DESIGN Tab contents in ribbon
Lecture 1
2016 -2017
Maha alani
8
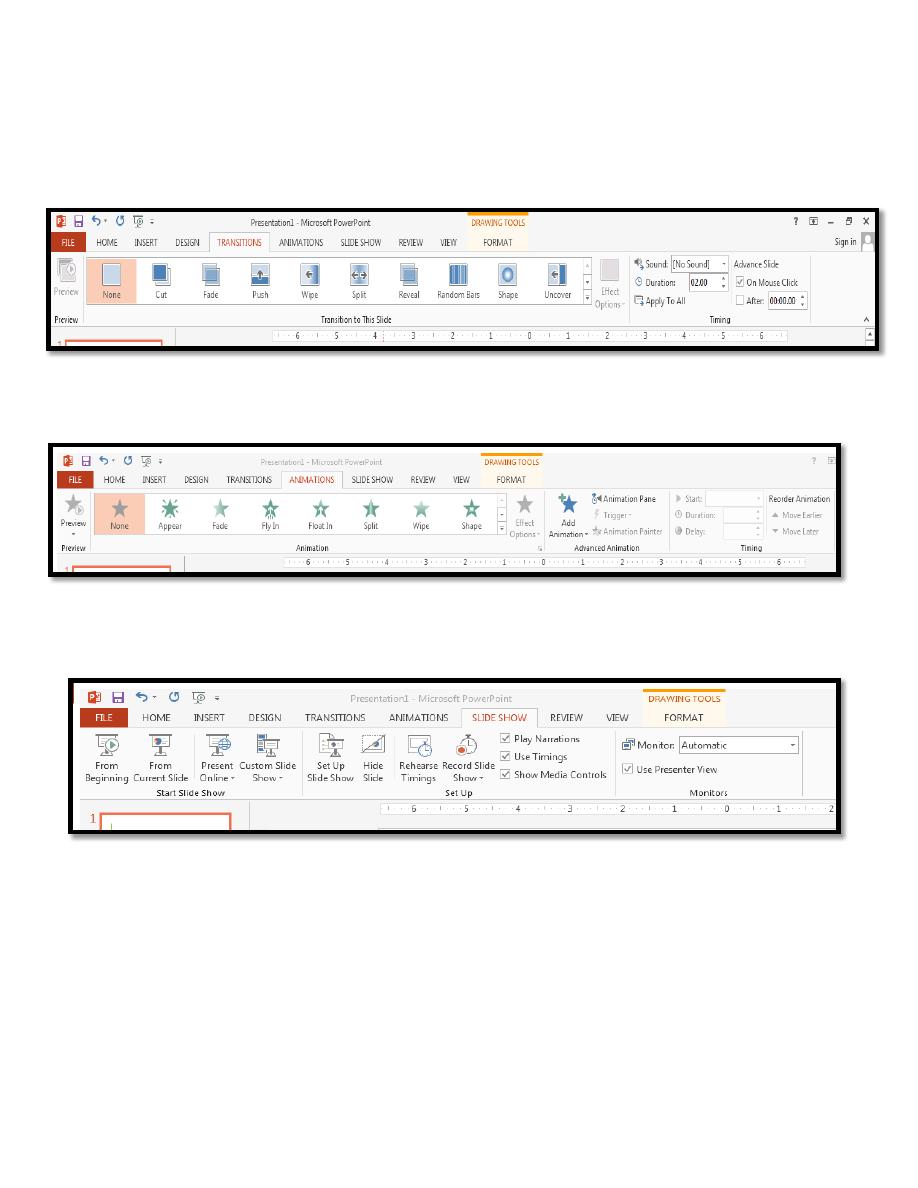
4.
TRANSITIONS Tab contents in ribbon
5.
ANIMATIONS Tab contents in ribbon
6.
SLIDE SHOW Tab contents in ribbon