Operative Dentistry
Proper diagnosis is vital for treatment planning.
DIAGNOSIS:PREVENTION:
To prevent any recurrence of the
causative disease and their defect.
INTERCEPTION:
Preventing further loss of tooth structure
by stabilizing an active disease process.
PRESERVATION:
Preservation of the vitality and
periodontal support of remaining tooth structure.
RESTORATION:
Includes restoring form, function, phonetics, and esthetics.
Purposes of Operative Dentistry
Indication of Operative Dentistry
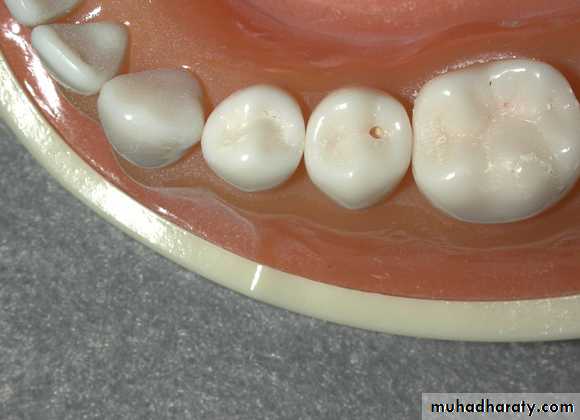
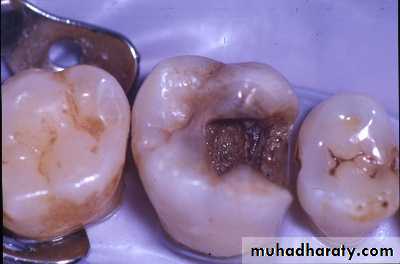
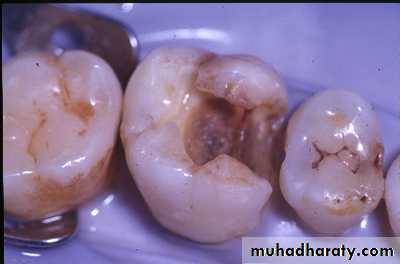
Caries;
Malformed, discolored,
or fractured teeth;
Restoration replacement.
Program of Operative Treatment
Patient assessmentExamination and diagnosis
Treatment planning
Pain control: local anesthetic
Isolation of the operating field
Cavity preparation
Matrix applicationPreparation of materials
Insertion and carving of materials
Finishing and Polishing
Program of Operative Treatment
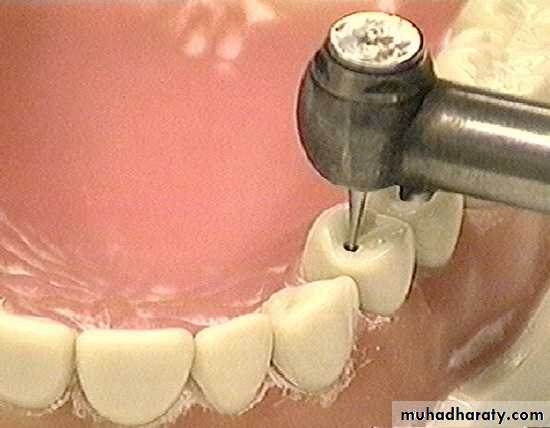
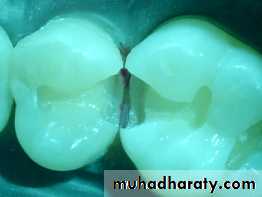
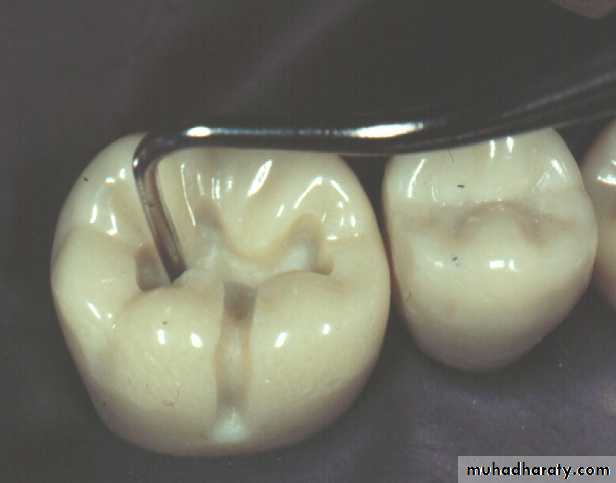
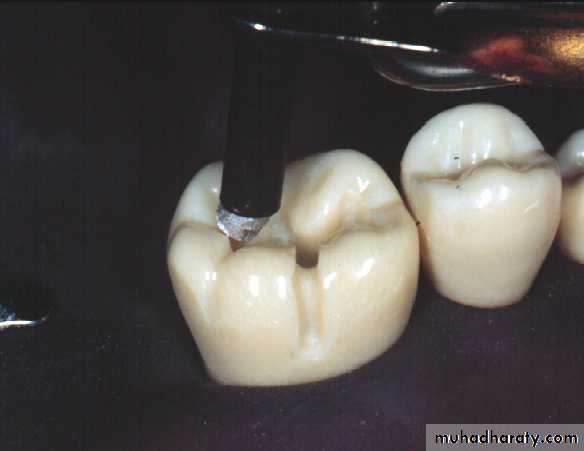
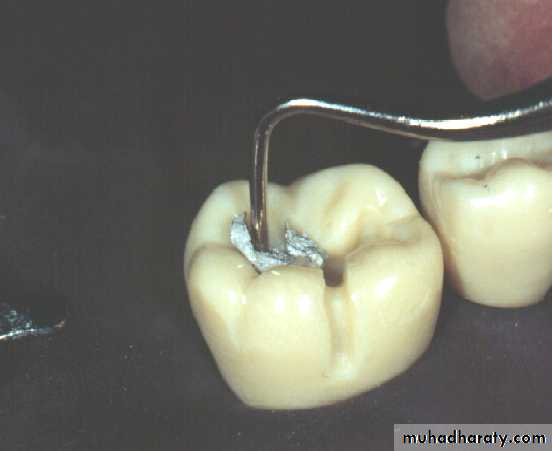
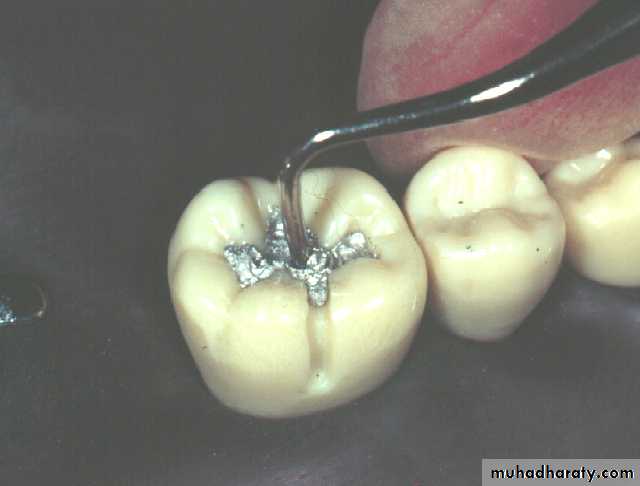
Cavity Preparation
The mechanical alteration of a defective, injured, or diseased tooth in order to best receive a restorative material which will re-establish a healthy state for the tooth including esthetic corrections where indicated, along with normal form and function.
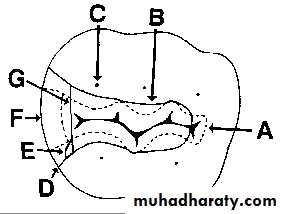
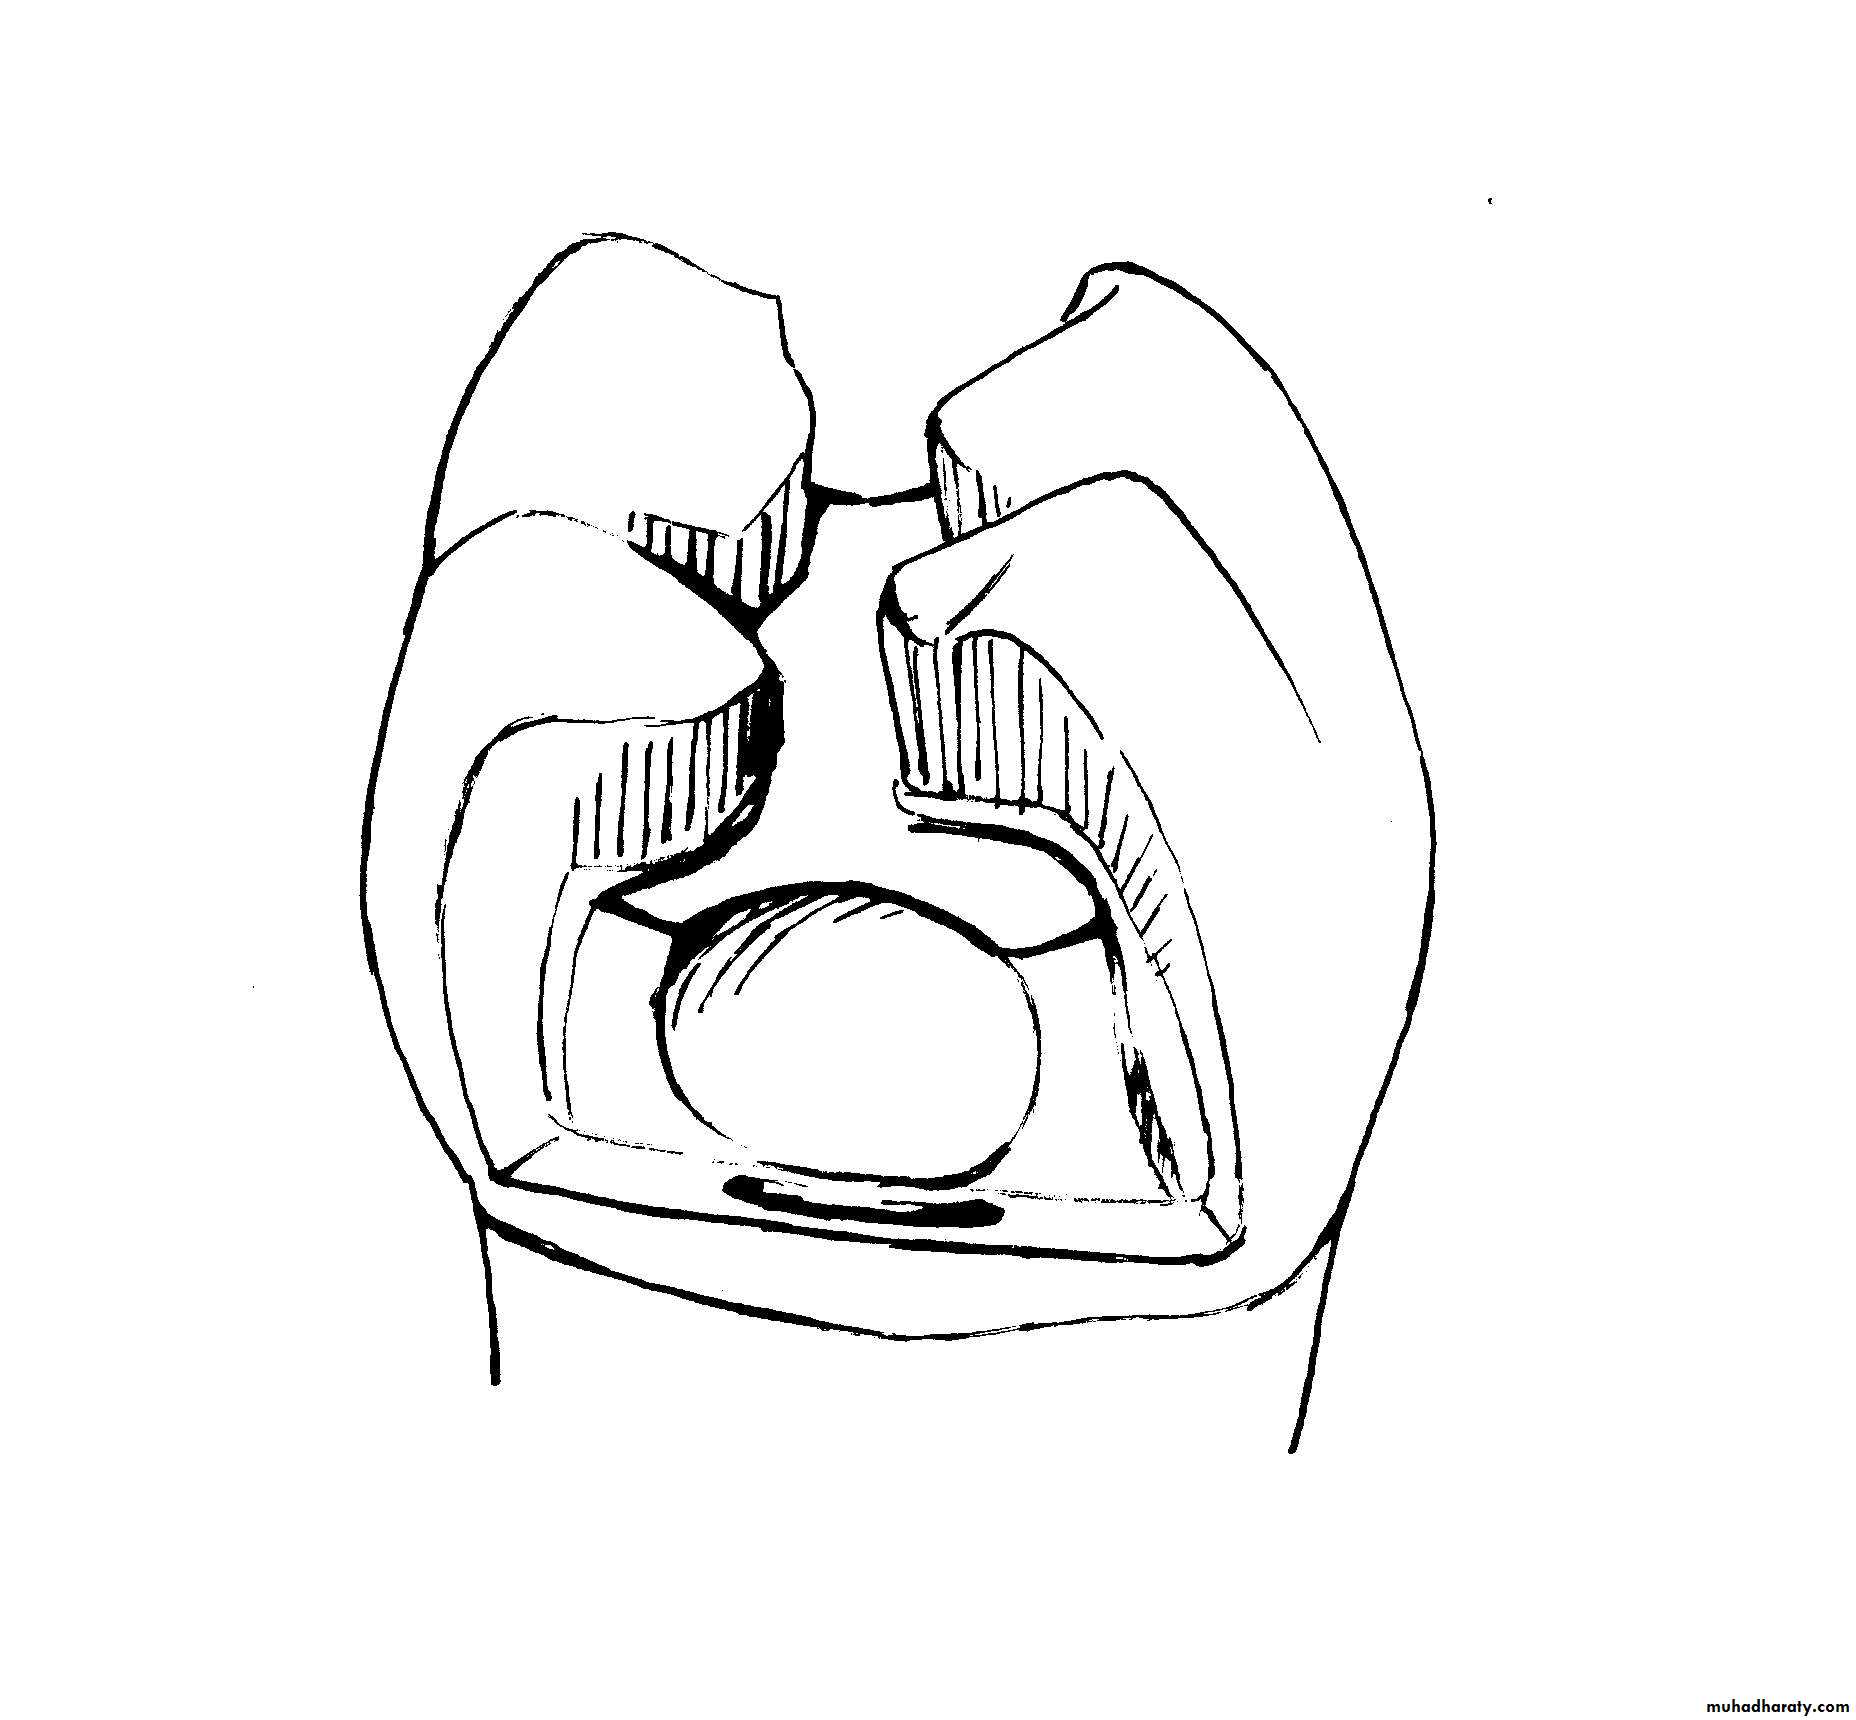
Cavity Structure
wallsangles
cavity

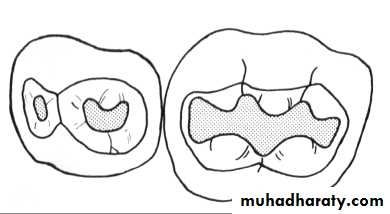
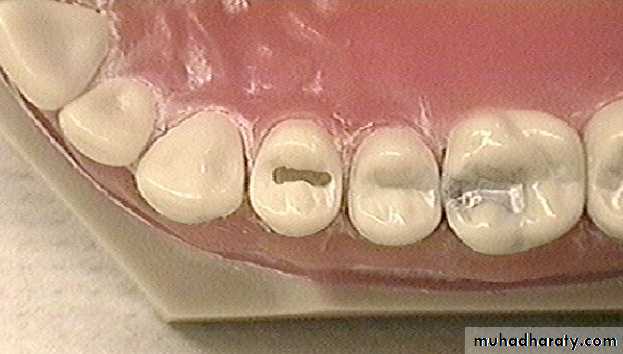
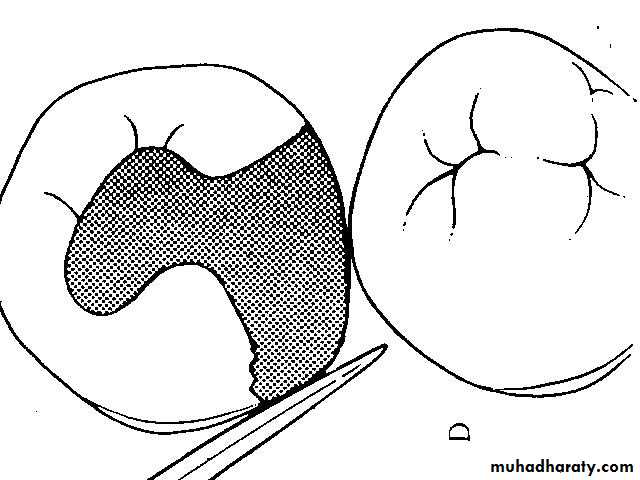
Classification of cavity
Class IClass II
Class III
Class IV
Class V
Class VI
—G.V.Black in 1908
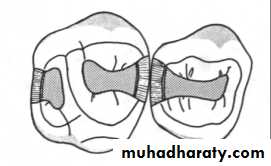
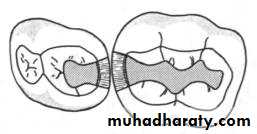
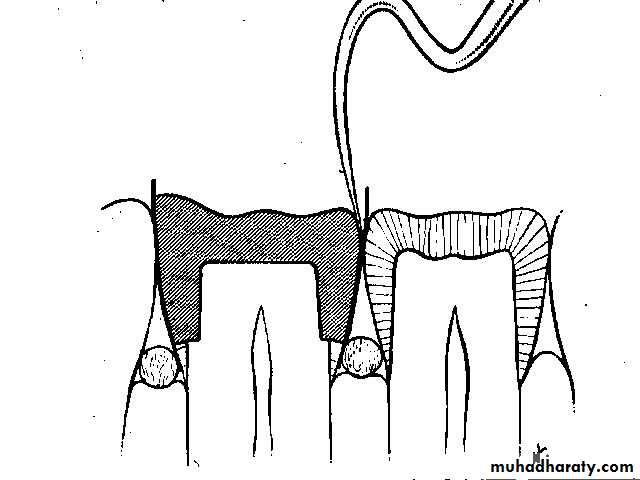
Cavity
Simple cavity: only one tooth surface is involved.Compound cavity: two surfaces are involved.
Complex cavity: three or more surfaces are involved.
Class 1
Class 2Class 1
Class 2
Class 3
Class 4
Class 5
Class 6
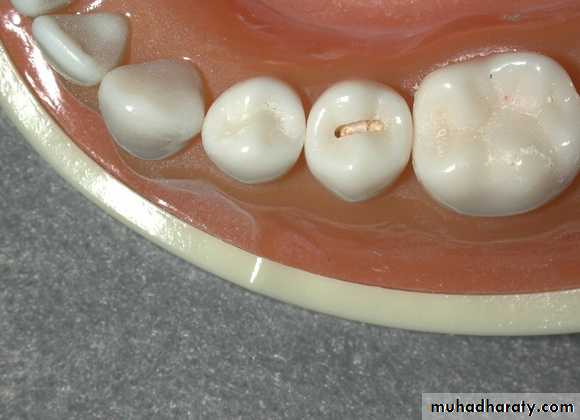
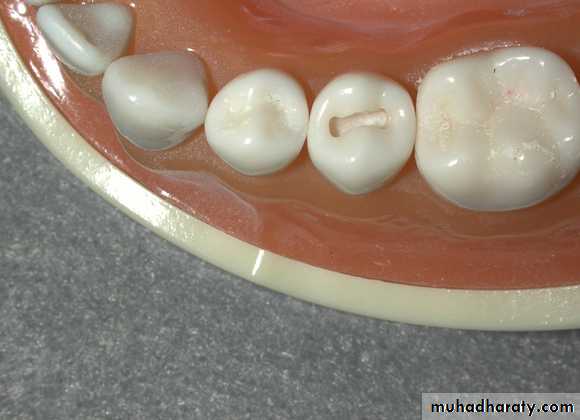
Stages and Steps in Cavity Preparation
Initial cavity preparation stageFinal cavity preparation stage
Initial cavity preparation stage
Step 1 Outline form and initial depth
Step 2 Primary resistance formStep 3 Primary retention form
Step 4 Convenience form
Final cavity preparation stage
Step 5 Removal of any remaining infecteddentin if indicated
Step 6 Pulp protection
Step 7 Secondary resistance & retention form
Step 8 Procedure for finishing external walls
Step 9 Final procedures
Initial cavity preparation stage
Step 1 Outline form and initial depthStep 2 Primary resistance form
Step 3 Primary retention form
Step 4 Convenience form
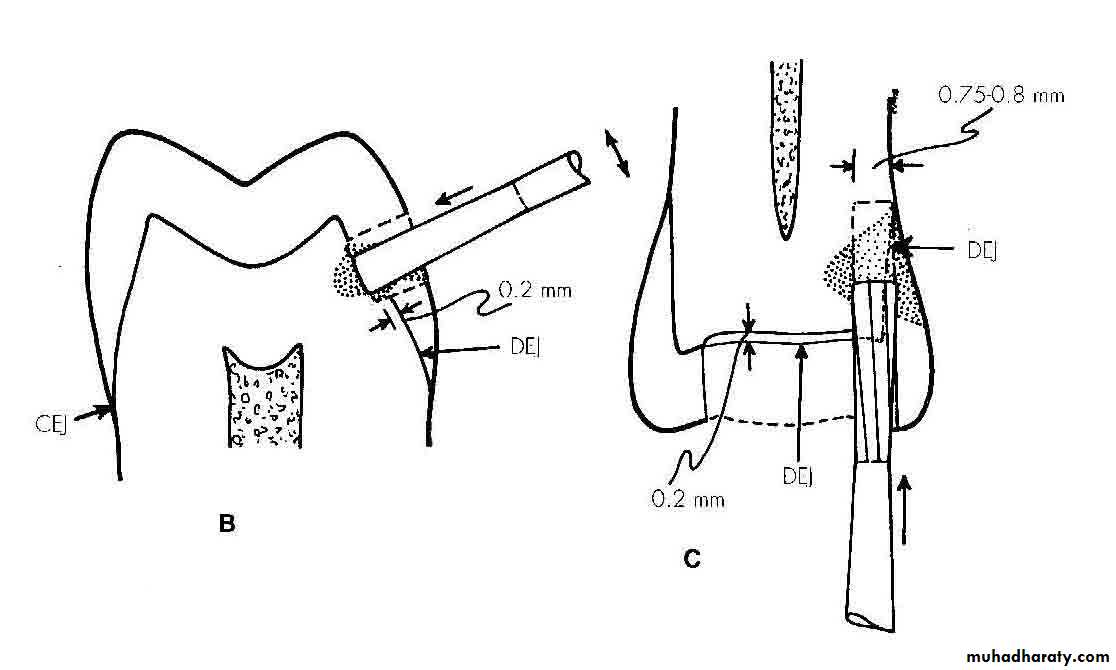
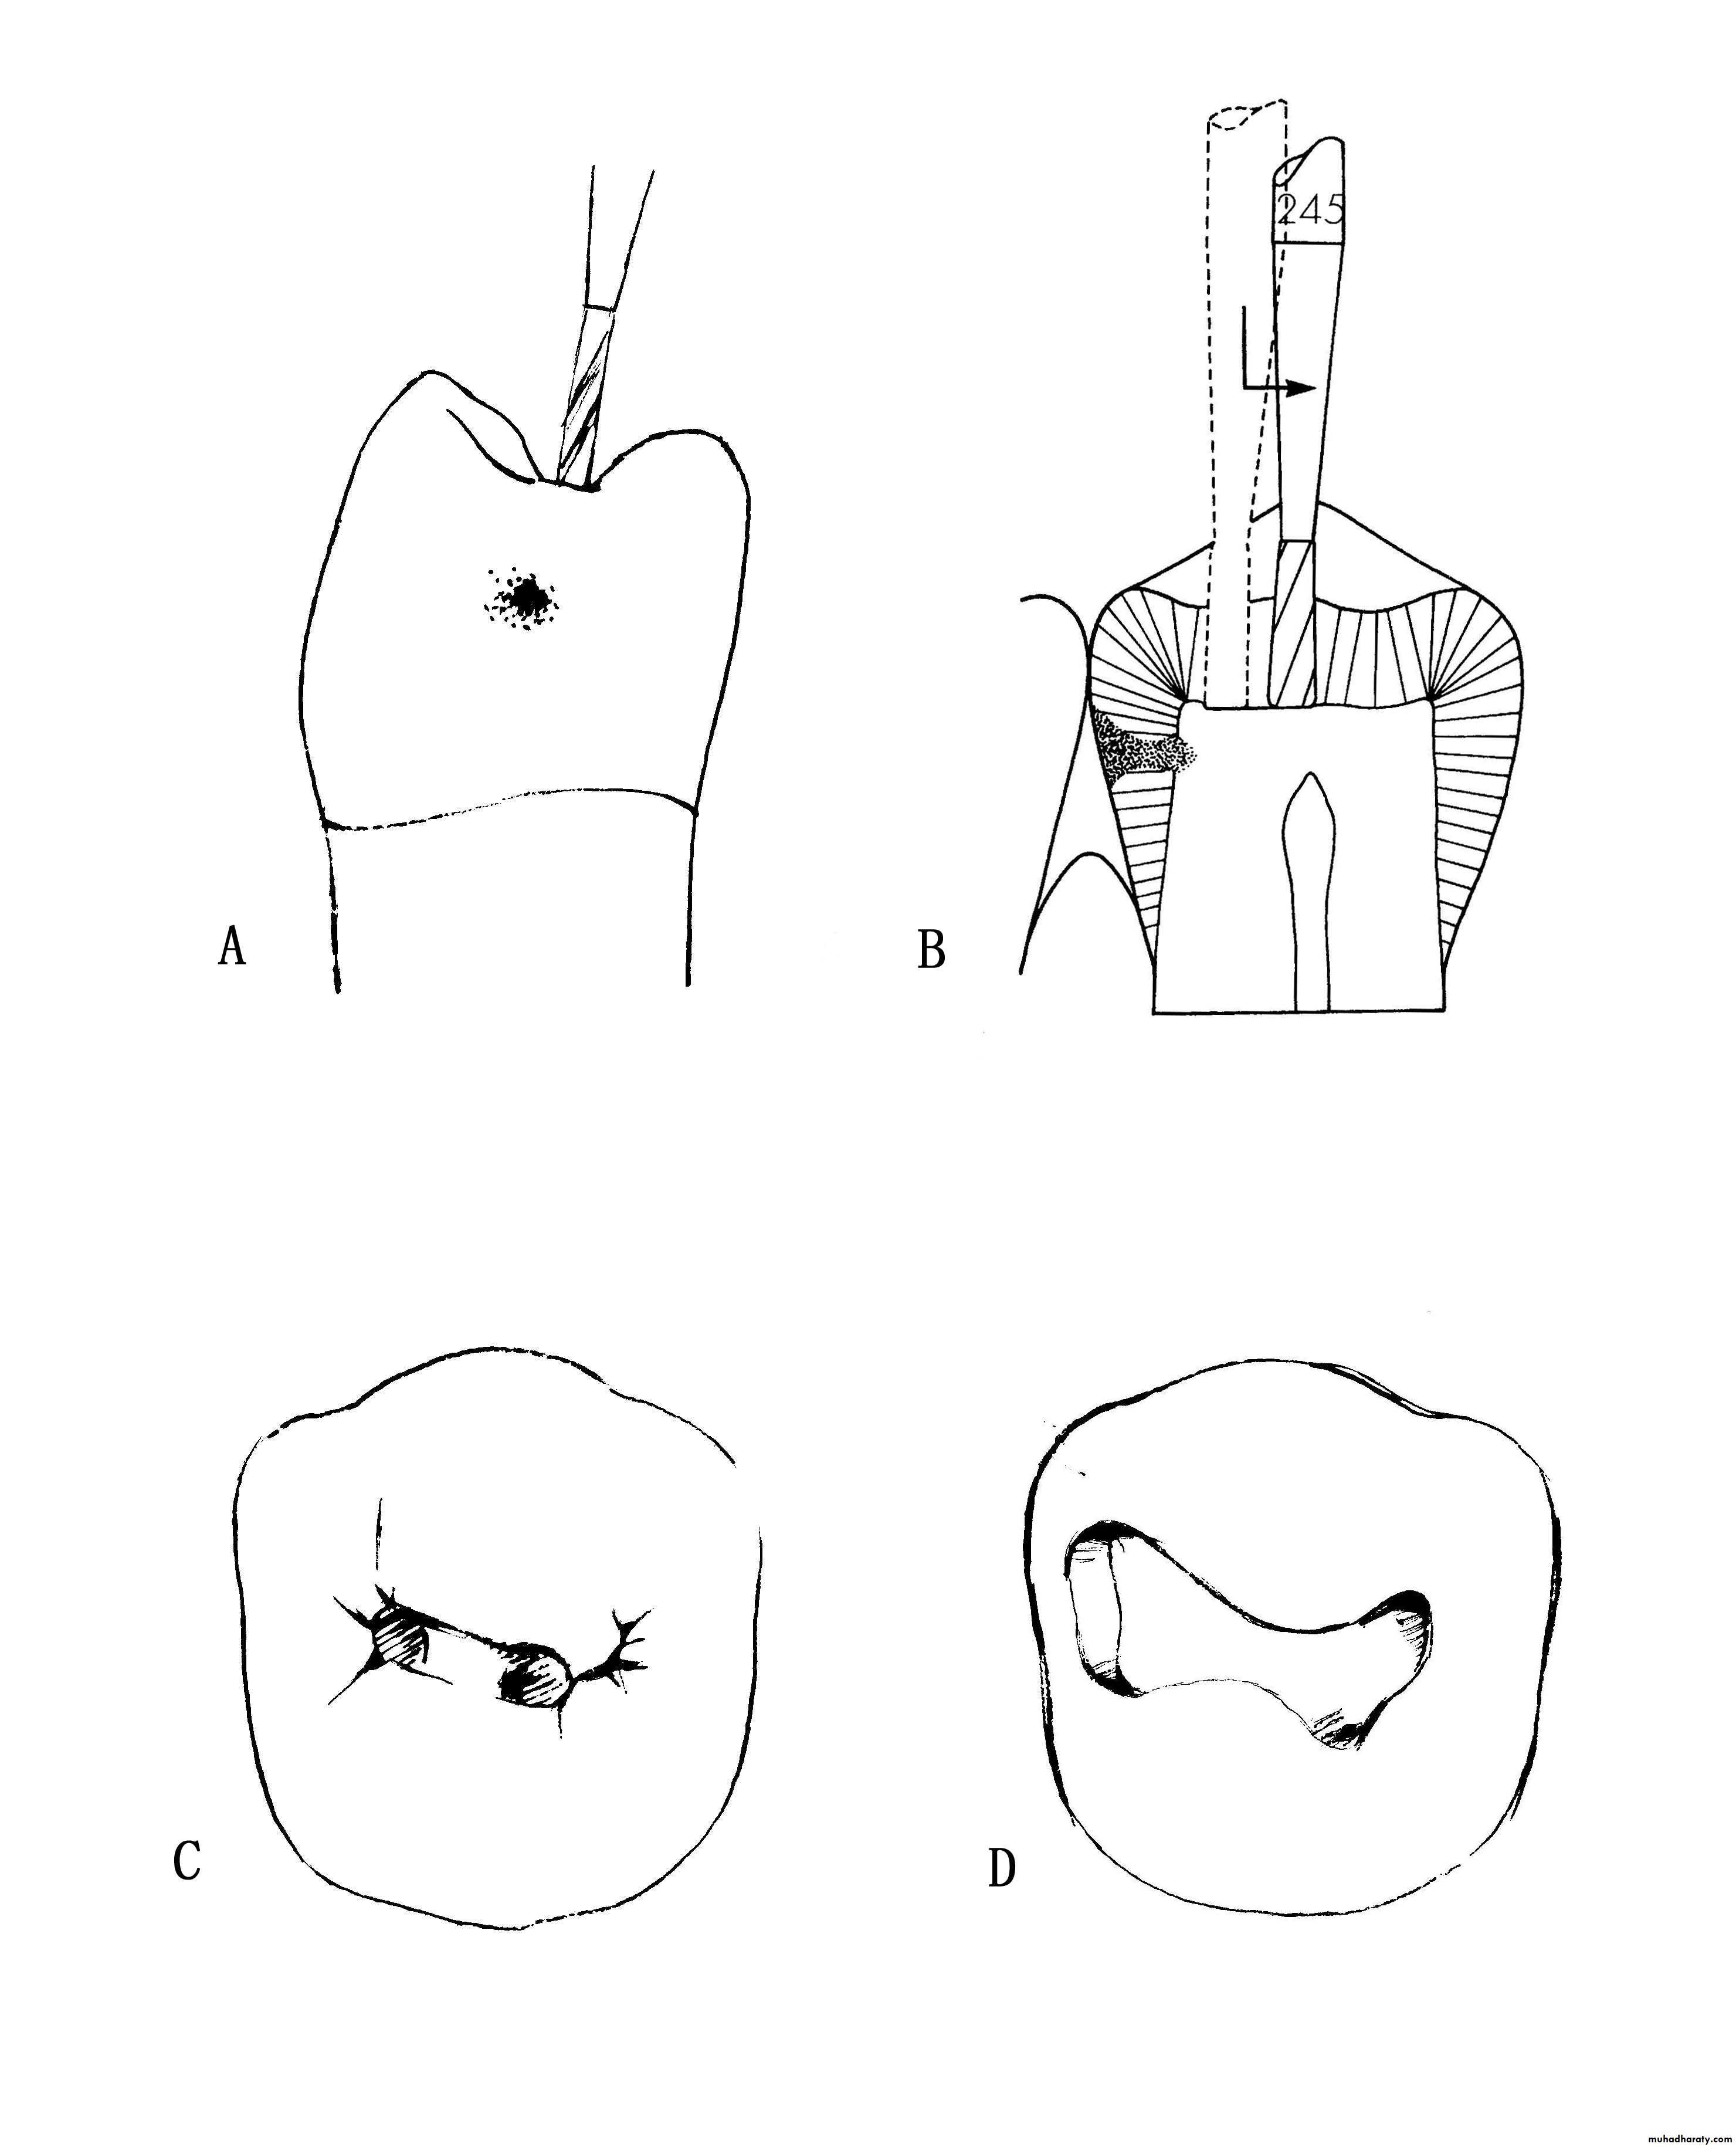
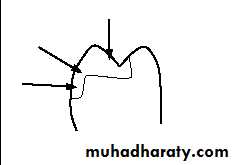
Outline Form and Initial Depth Ⅰ
Definition:

placing the cavity margins in the positions they will occupy in the final preparation;
preparing an initial depth of 0.2~0.8 mm pulpally of the dentinoenamel junction position or normal root surface position.
Maxillary Class Ⅰ outline form
Mandibular Class Ⅰ outline form
Maxillary Class Ⅱ outline form
Mandibular Class Ⅱ outline form
Common Error
Outline Form and Initial Depth Ⅱ
Principles: without any exceptionall friable and/or weakened enamel should be removed
all faults should be included
all margins should be placed in a position to afford good finishing of
the margins of the restoration.
Outline Form and Initial Depth Ⅲ
Features:preserving cuspal strength
preserving marginal ridge strength
minimizing facio-lingual extension
using enameloplasty
connecting two close faults or cavities
restricting the depth of the preparation into dentin.
Initial cavity preparation stage
Step 1 Outline form and initial depthStep 2 Primary resistance form
Step 3 Primary retention form
Step 4 Convenience form
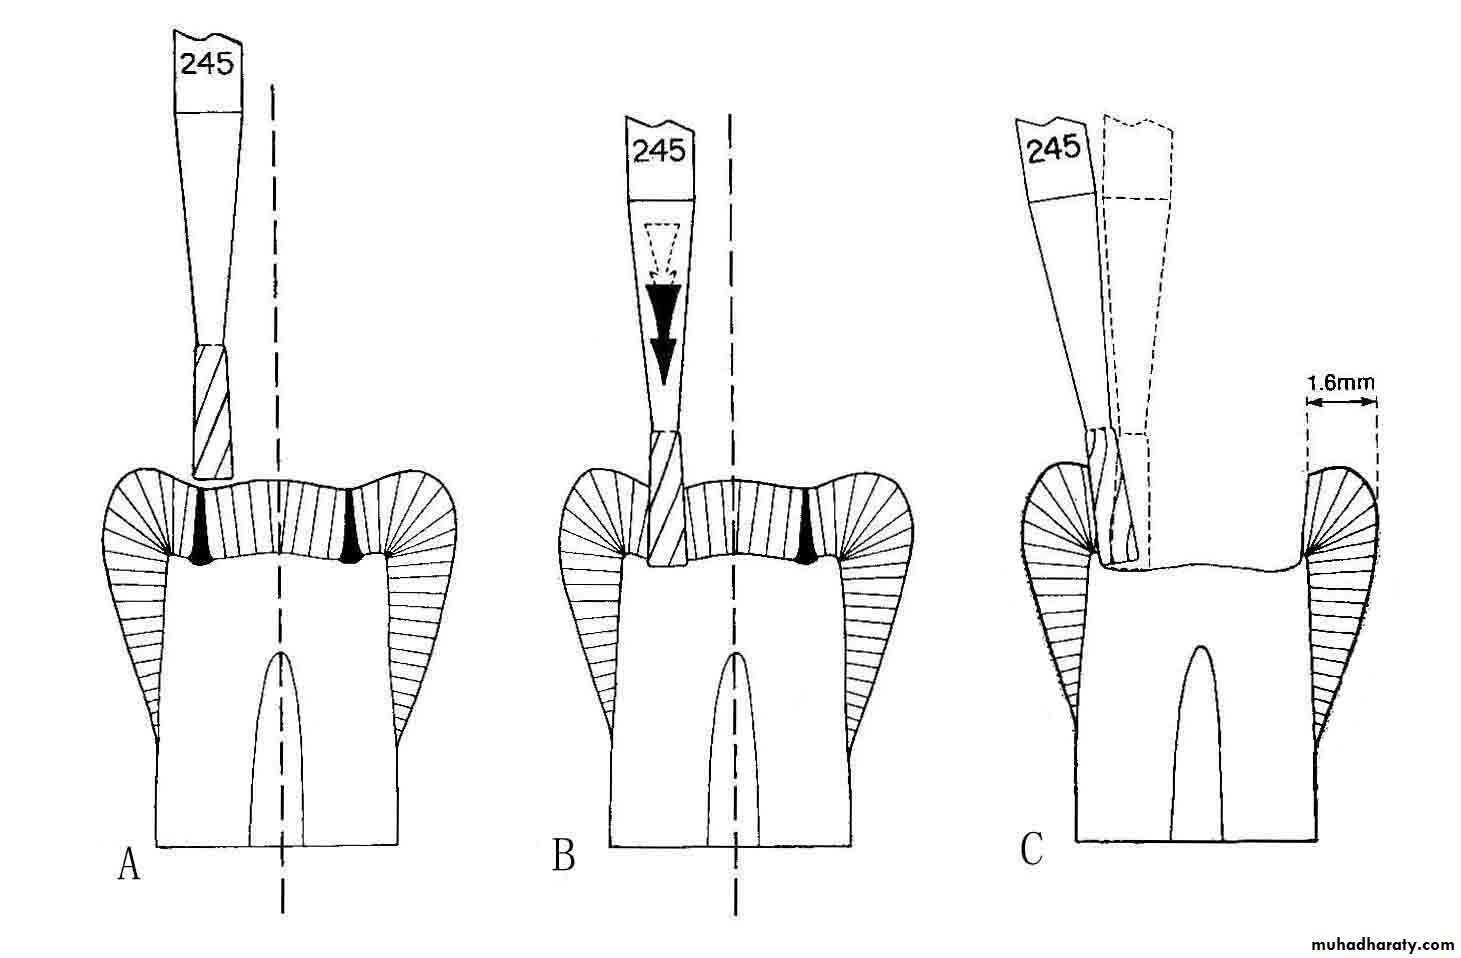
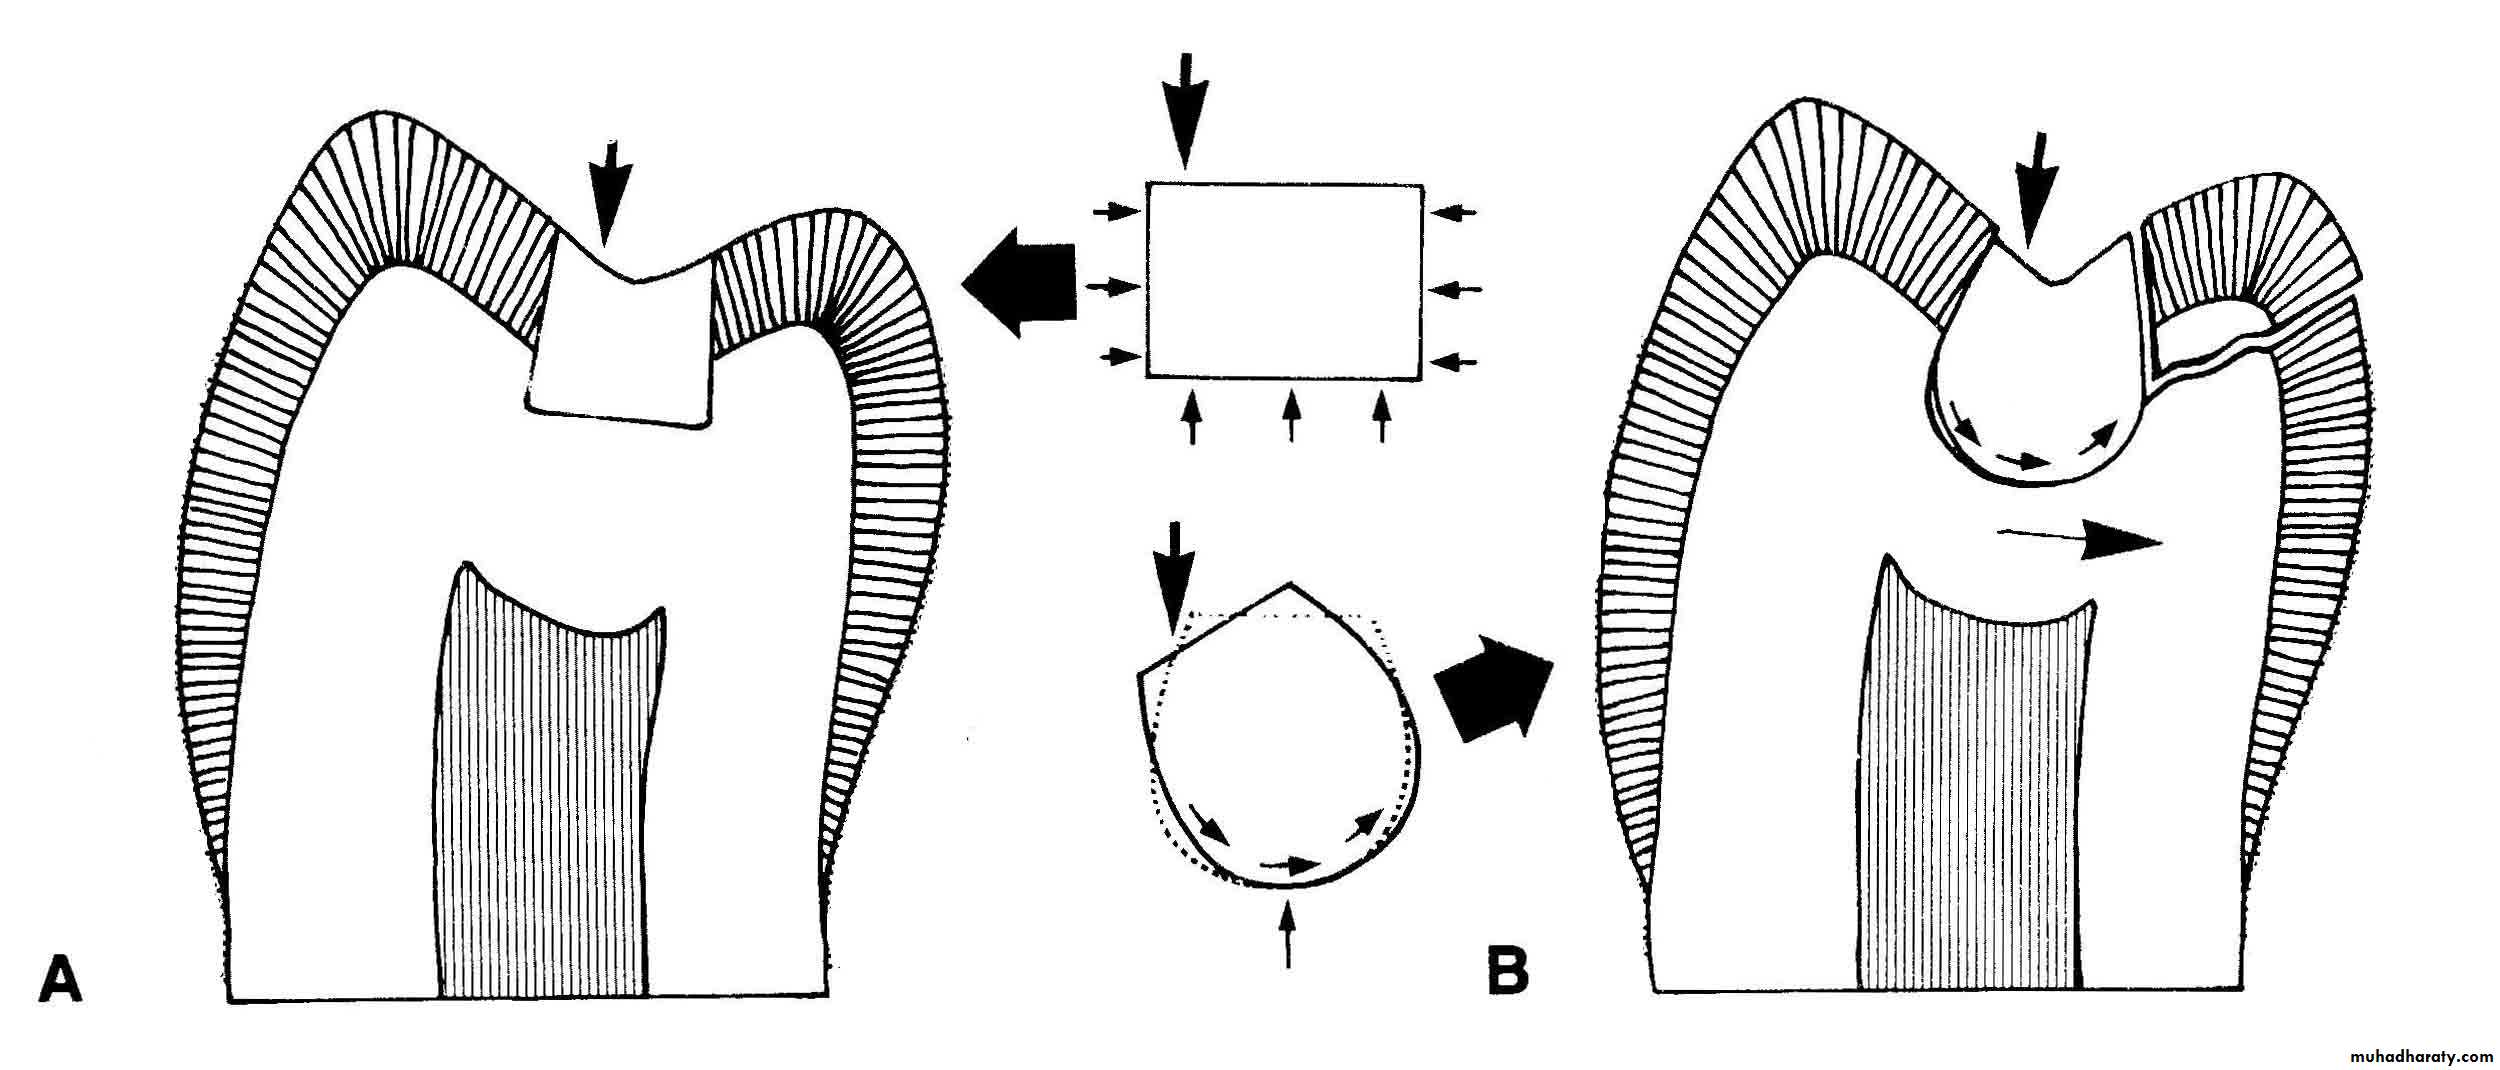
Primary Resistance Form Ⅰ
Definition:The shape and placement of the cavity walls that best enable both the restoration and the tooth to withstand, without fracture, masticatory forces delivered principally in the long axis of the the tooth.
Primary Resistance Form Ⅱ
Principles:To utilize the box shape with a relatively flat floor to resist occlusal loading by virtue of being at right angles to mastication force;
To restrict the extension of the external walls (keep as small as possible) to allow strong cusp and ridge areas to remain with sufficient dentin support;
Primary Resistance Form Ⅲ
Principles:To have a slight rounding of internal line angles to reduce stress concentration in tooth structure;
To provide enough thickness of restorative material to prevent its fracture under load.
Primary Resistance Form Ⅳ
Feature:Box shape
Relatively flat floors
Inclusion of weakened tooth structure
Preservation of cusps and marginal ridges
Rounded internal line angles
Adequate thickness of restorative materials
Reduction of cusps for capping if indicated
Initial cavity preparation stage
Step 1 Outline form and initial depthStep 2 Primary resistance form
Step 3 Primary retention form
Step 4 Convenience form
Primary Retention Form Ⅰ
Definition:The shape or form of the prepared cavity that resists displacement or removal of the restoration from tipping or lifting forces.
In many respects retention and resistance form
are accomplished in the same cutting procedure.
Primary Retention Form Ⅱ
Principles: depending on the materialsAmalgam restoration:
developing external cavity walls that converge occlusally and dovetail design
The devotail design provide retention form
to the occlusal portion of the cavity.
The occlusal convergence of the walls offers
retention in the proximal portion of the cavityagainst displacement occlusally.
Primary Retention Form Ⅲ
Principles: depending on the materialsComposite restoration:
a mechanical bond between the material
and conditioned, prepared tooth structure.
Initial cavity preparation stage
Step 1 Outline form and initial depthStep 2 Primary resistance form
Step 3 Primary retention form
Step 4 Convenience form
Convenience Form Ⅰ
Conception:The shape or form of the cavity that provides for adequate observation, accessibility, and ease of operation in preparing and restoring the cavity.
Convenience Form Ⅱ
Principles:Allow access for caries removal
Allow access for restoration placementAllow access to margins for finishing,
evaluation and cleaning

Convenience Form
Final cavity preparation stageStep 5 Removal of any remaining infected
dentin if indicatedStep 6 Pulp protection
Step 7 Secondary resistance & retention form
Step 8 Procedure for finishing external walls
Step 9 Final procedures
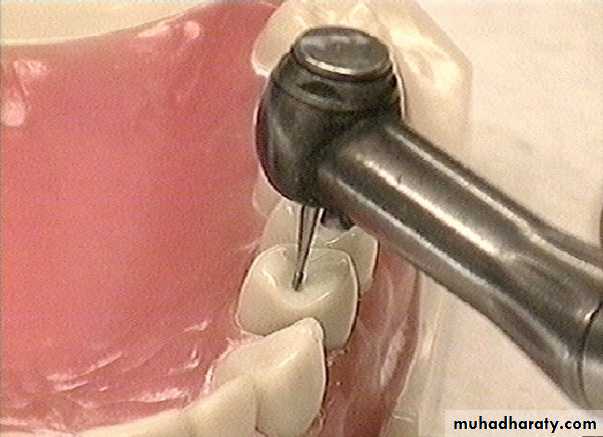
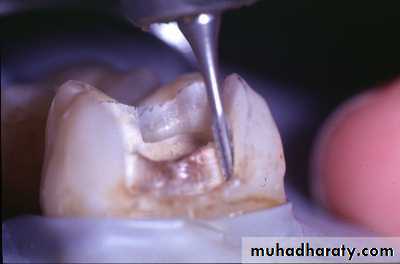
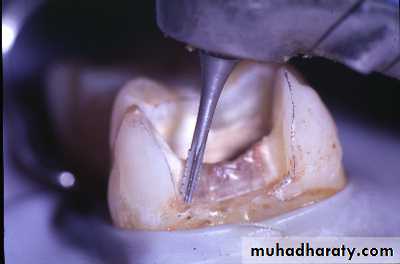
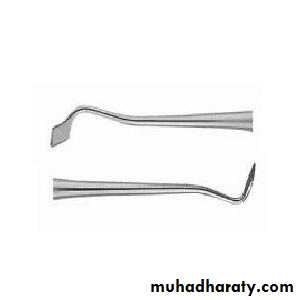
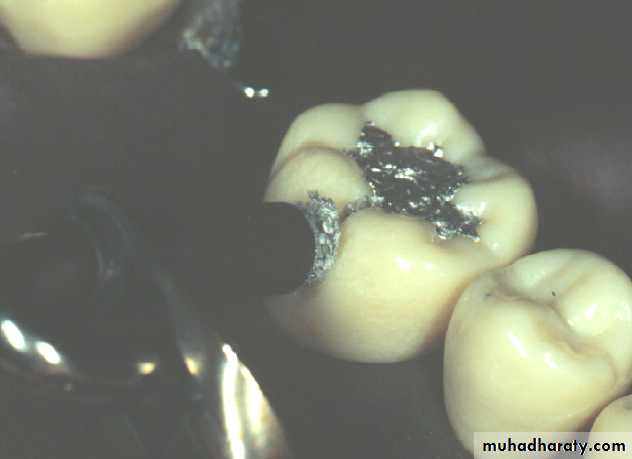
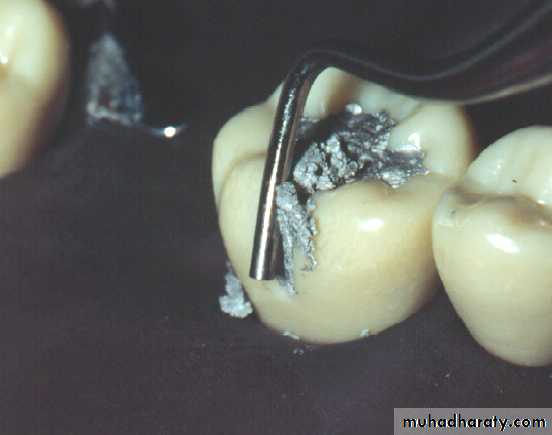
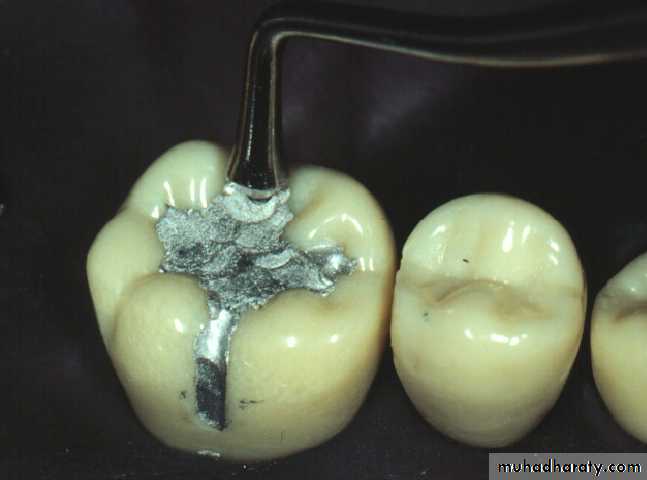
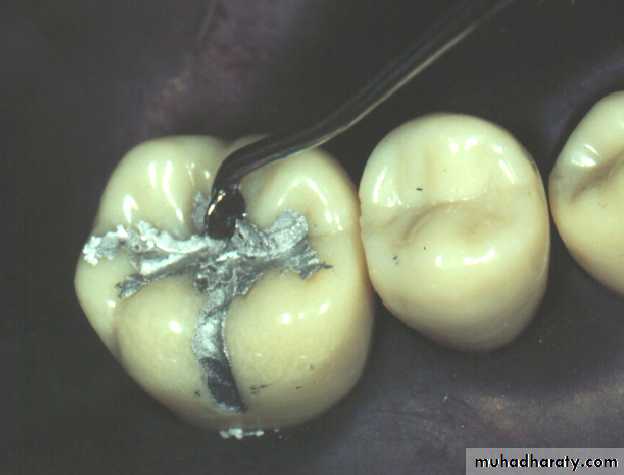
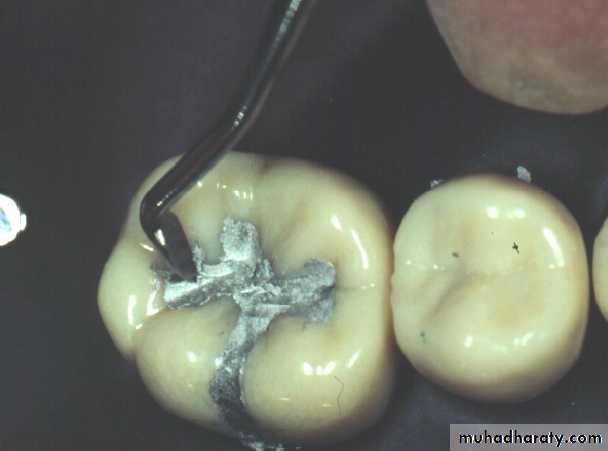
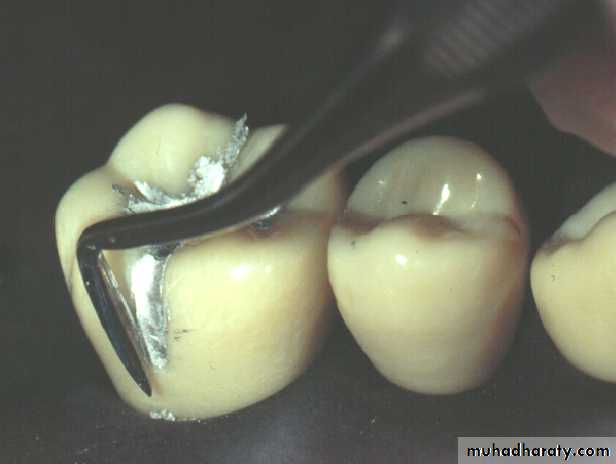
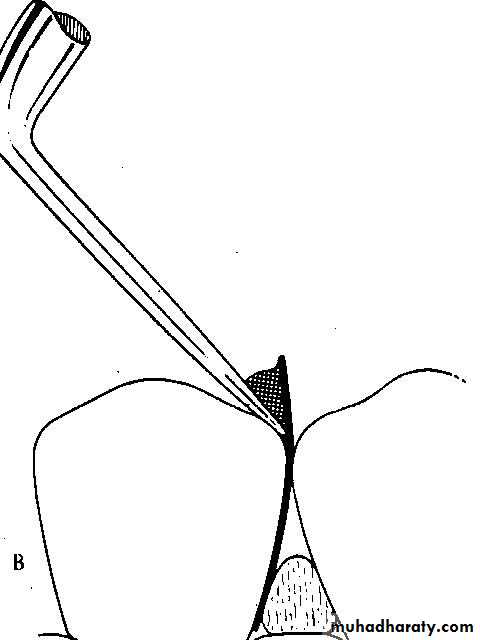
Removal of any remaining infected dentin if indicated
Definition:The elimination of any infected carious tooth structure or faulty restorative material left in the tooth after initial cavity preparation.
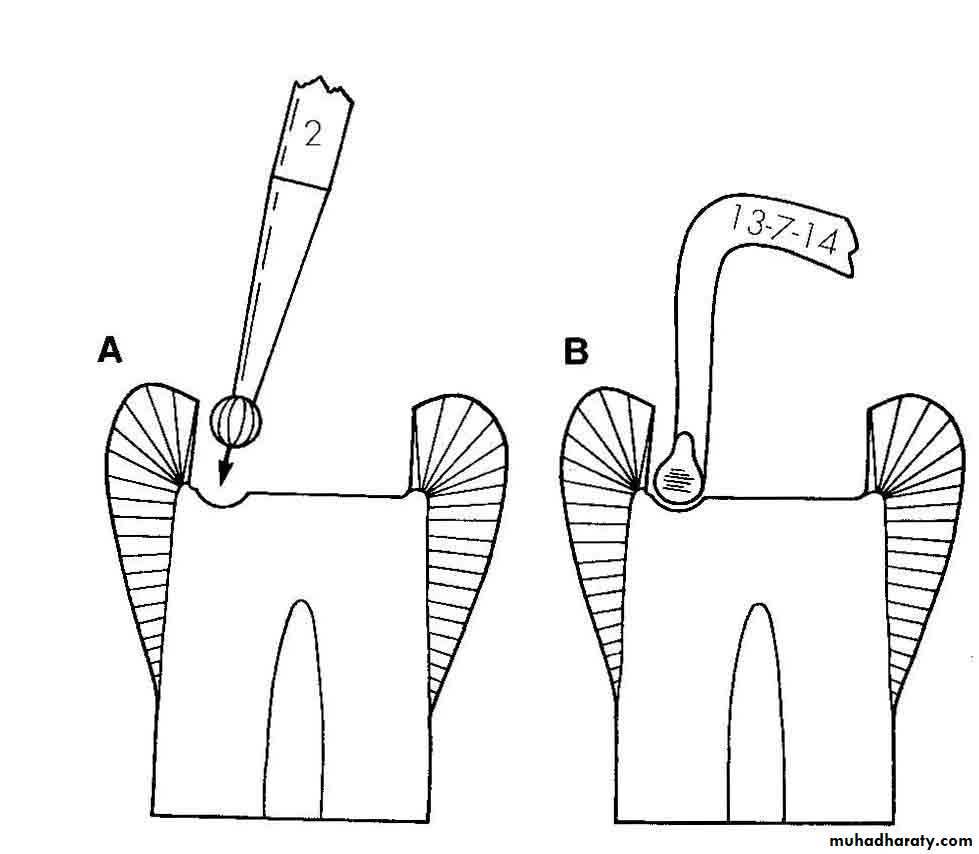
Removal of dentinal caries using round burs and spoon excavators
Final cavity preparation stage
Step 5 Removal of any remaining infecteddentin if indicated
Step 6 Pulp protection
Step 7 Secondary resistance & retention form
Step 8 Procedure for finishing external walls
Step 9 Final procedures
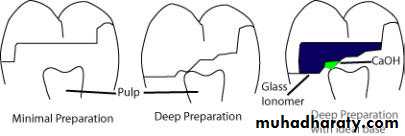
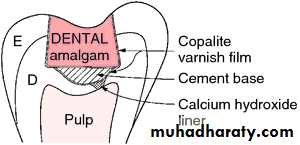
Pulp protection
Using liners or basesto protect the pulp or
to aid pulpal recovery or both.
Final cavity preparation stage
Step 5 Removal of any remaining infecteddentin if indicated
Step 6 Pulp protection
Step 7 Secondary resistance & retention form
Step 8 Procedure for finishing external walls
Step 9 Final procedures
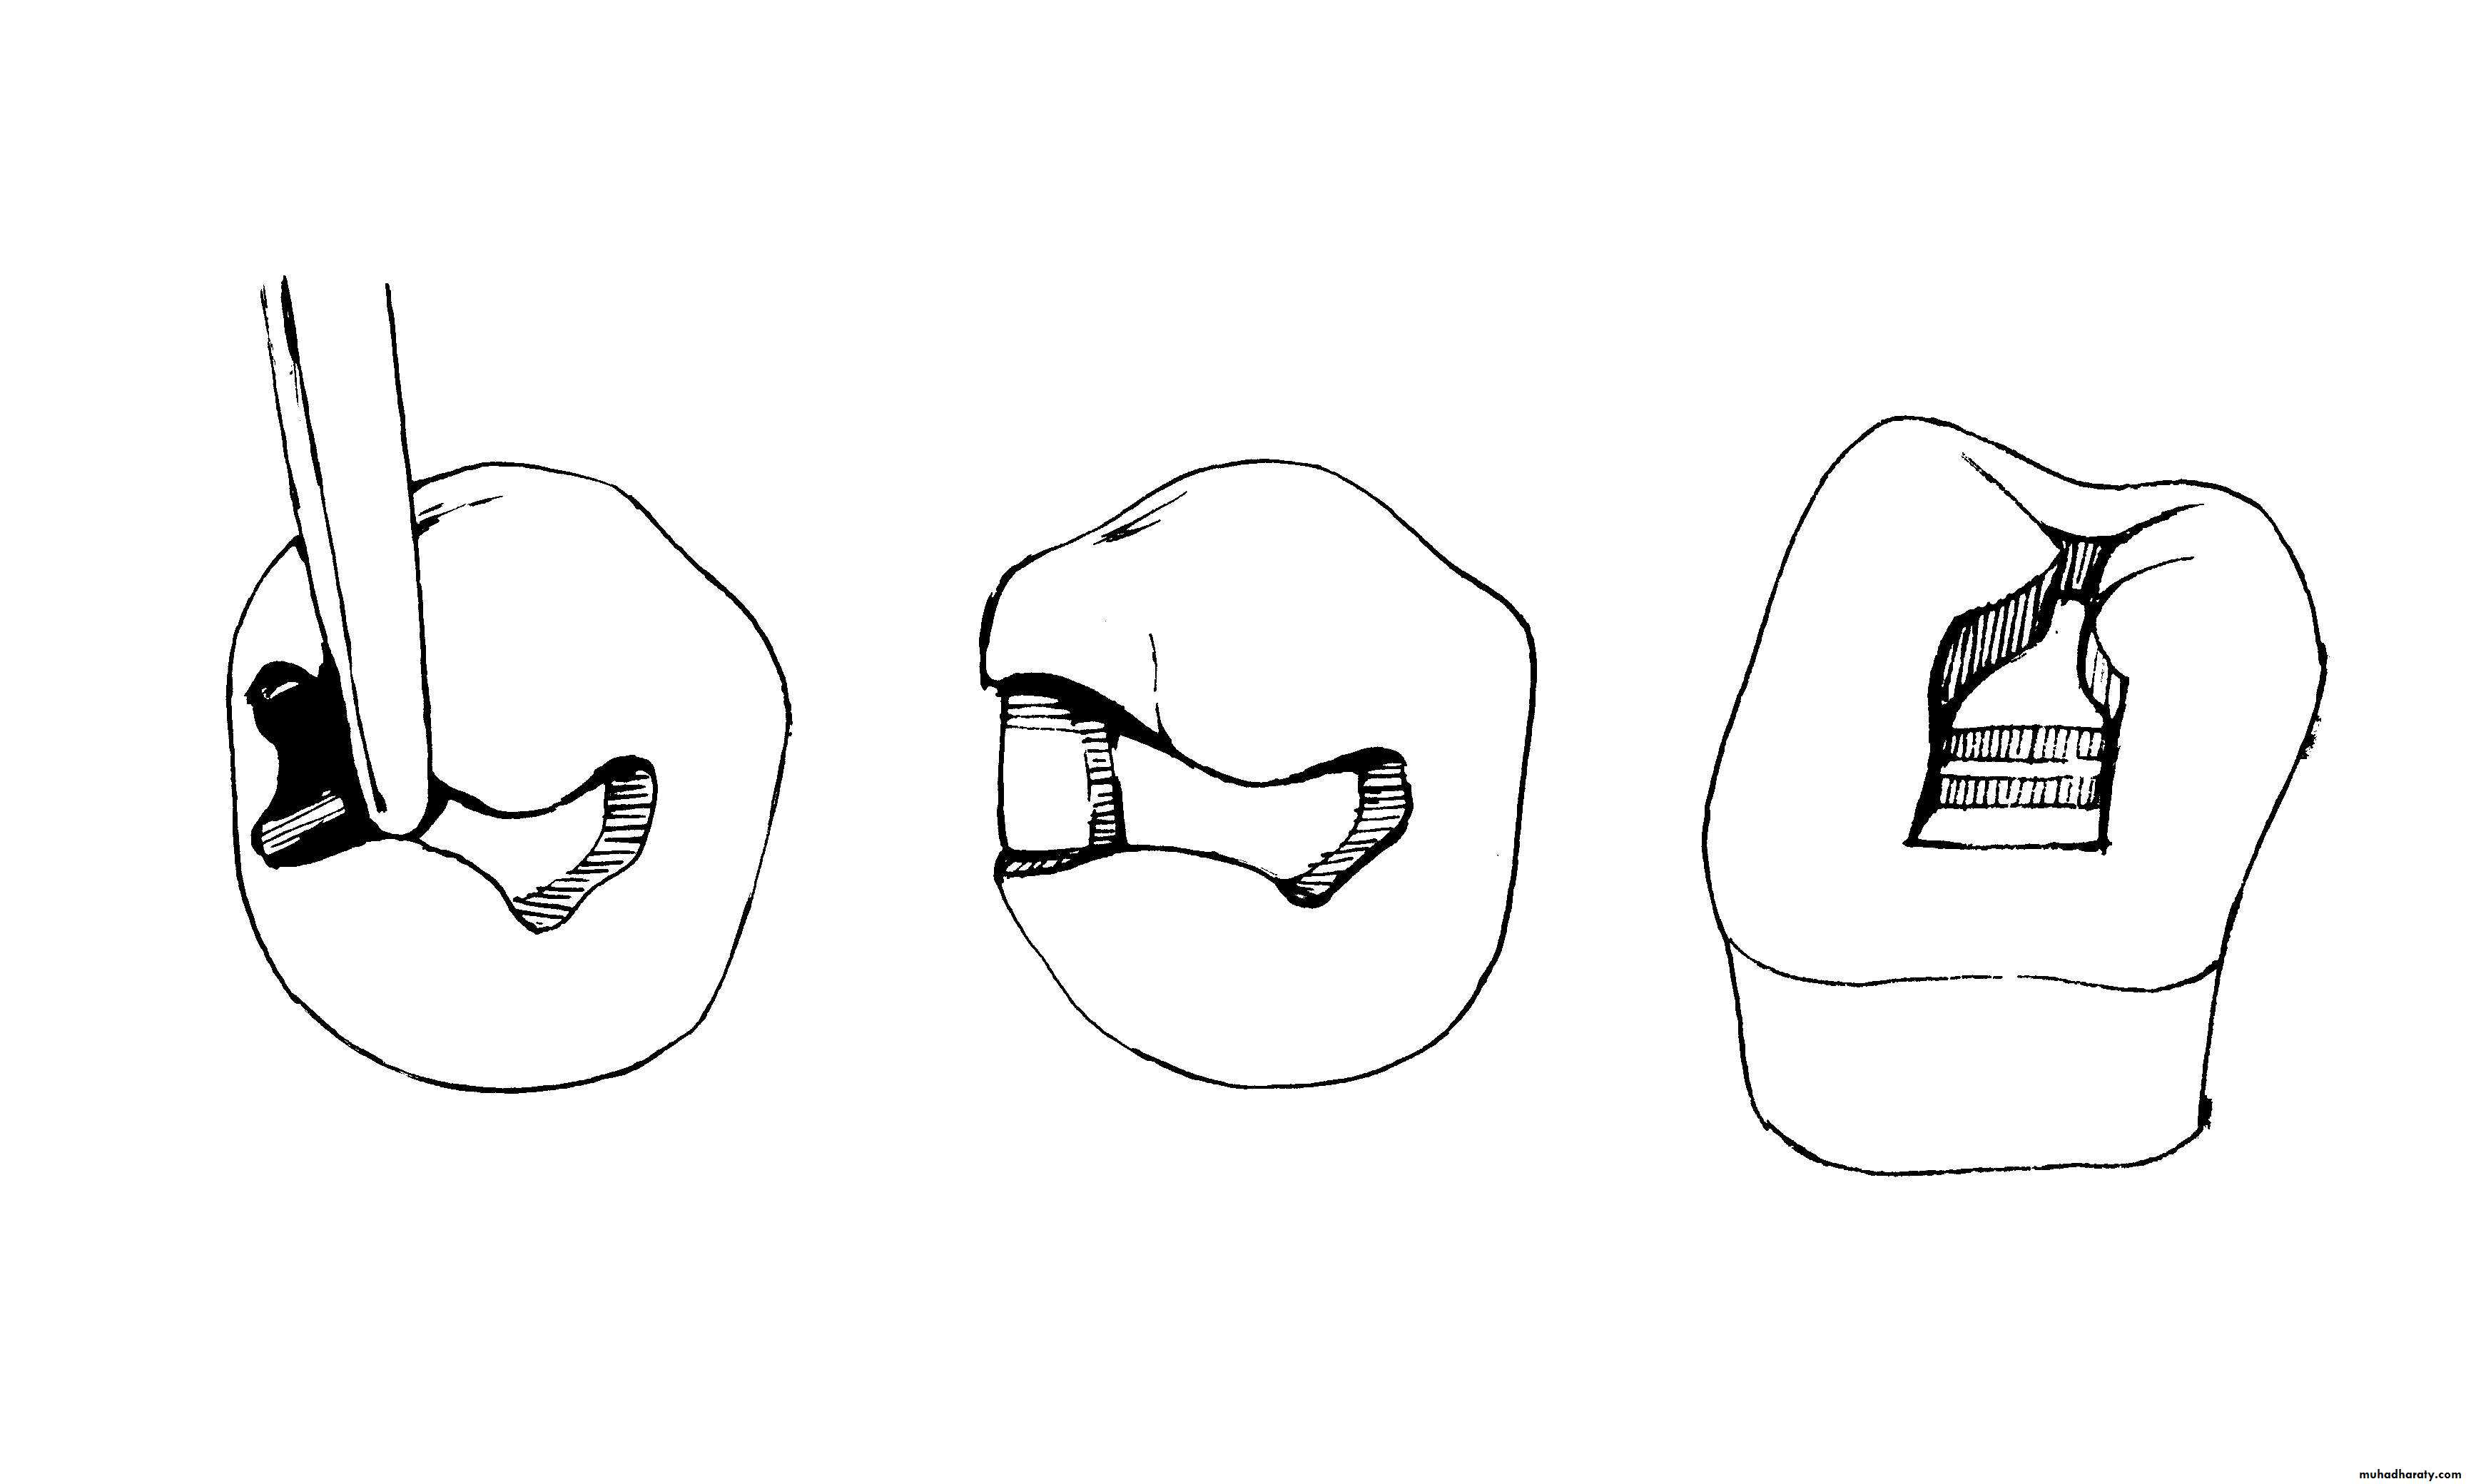
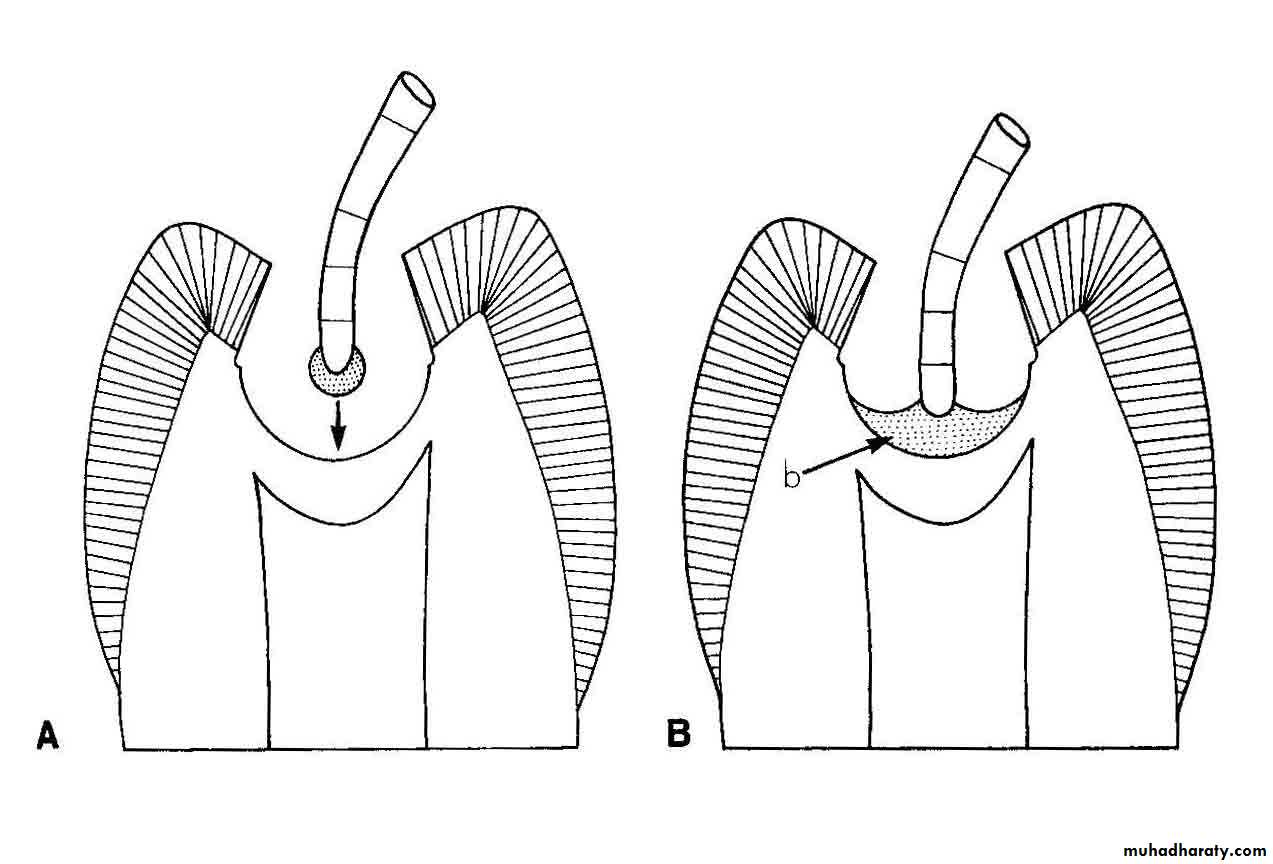
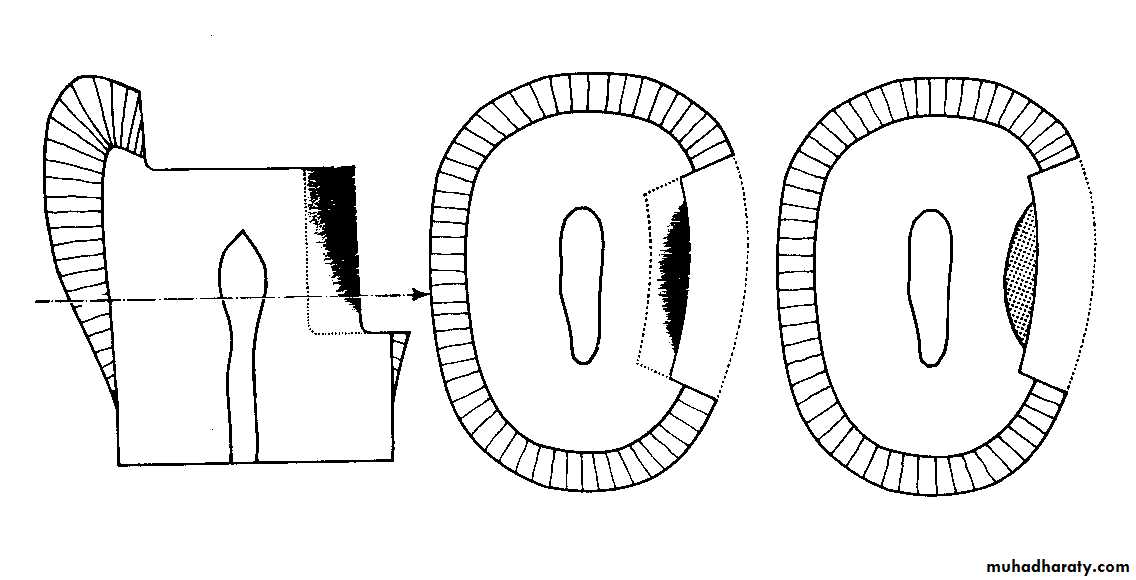
Secondary resistance and retention forms Ⅰ
Most compound and complex cavity preparations require additional resistance and retention form.
The exception being those preparations that are very conservative.
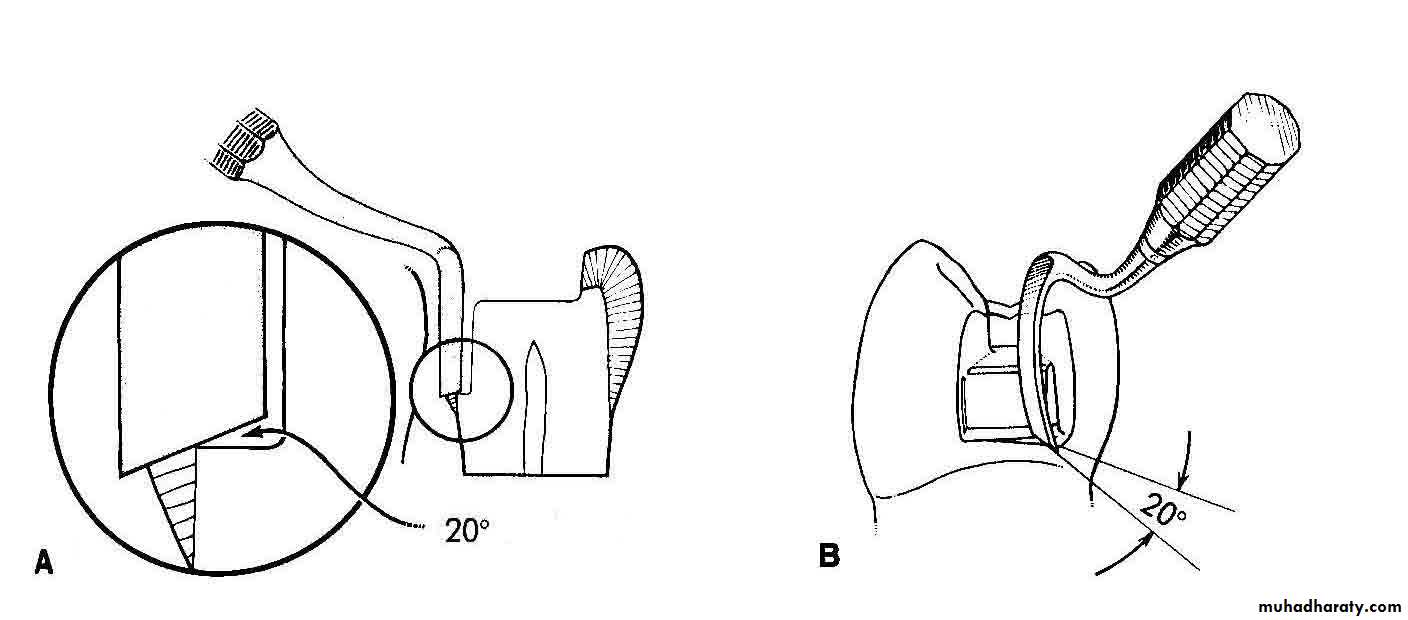
Secondary resistance and retention forms ⅡMechanical forms
Cavity wall conditioning form
Mechnical form:
Proximal locksProximal slots

Proximal locks
Slot on gingival wall
Final cavity preparation stageStep 5 Removal of any remaining infected
dentin if indicated
Step 6 Pulp protection
Step 7 Secondary resistance & retention form
Step 8 Finishing external walls
Step 9 Final procedures
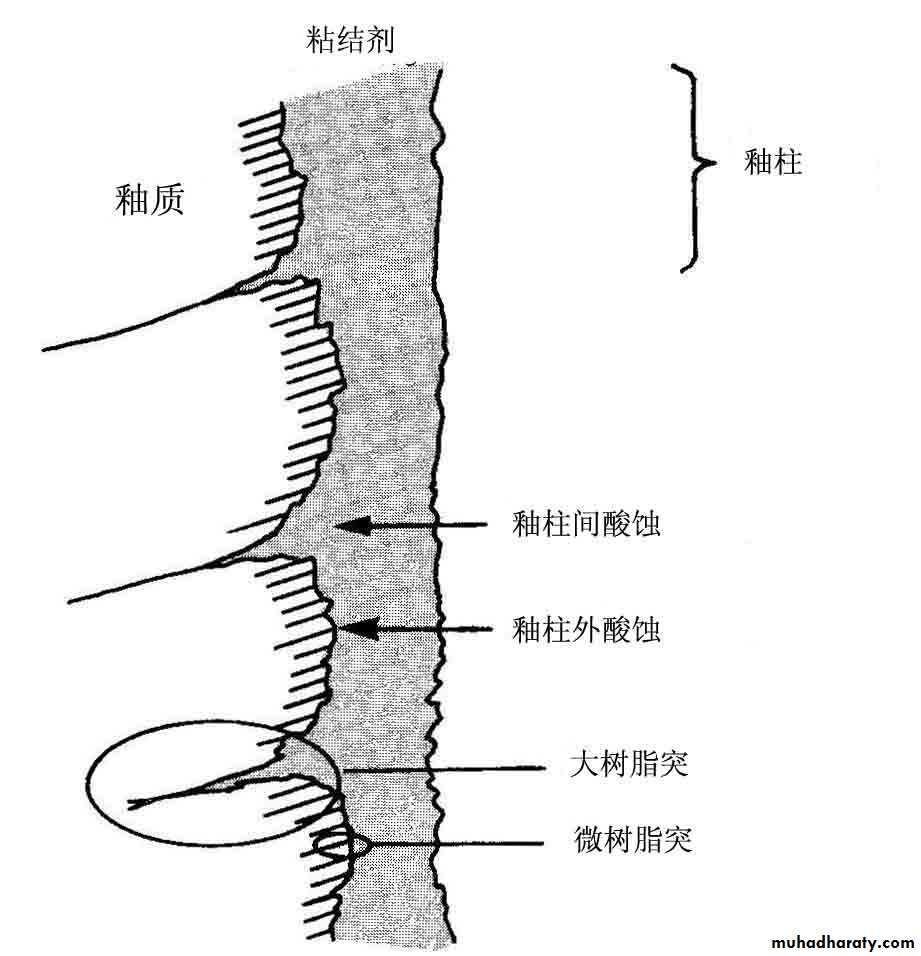
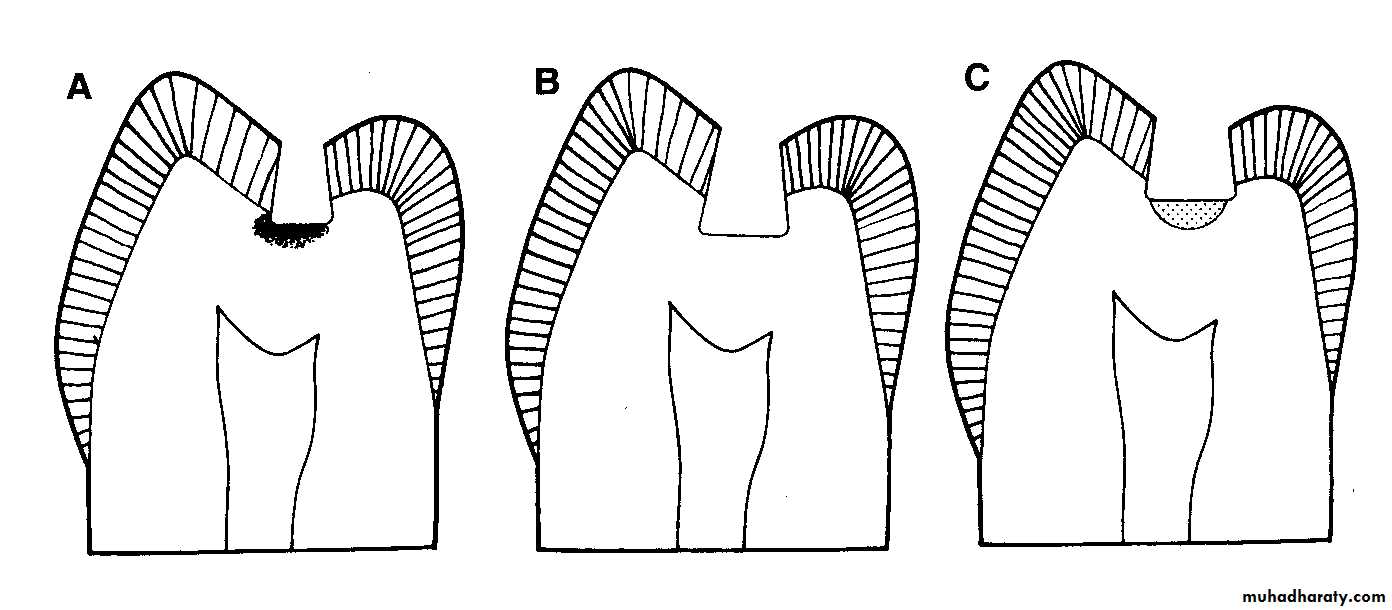
Finishing the external walls Ⅰ
Definition:is the further development of a specific cavosurface design and degree of smoothness that produces the maximum effectiveness of the restorative material being used.
Finishing the external walls Ⅱ
Objectives:To create the best marginal seal possible between the restorative material and tooth structure;
To afford a smooth marginal junction;
To provide maximum strength of both the tooth and the restorative material at and near the margin.
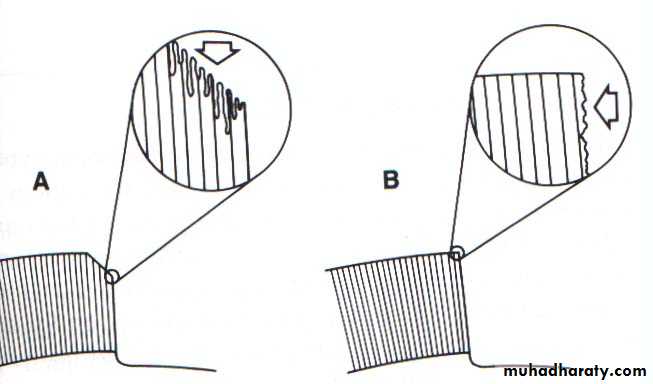
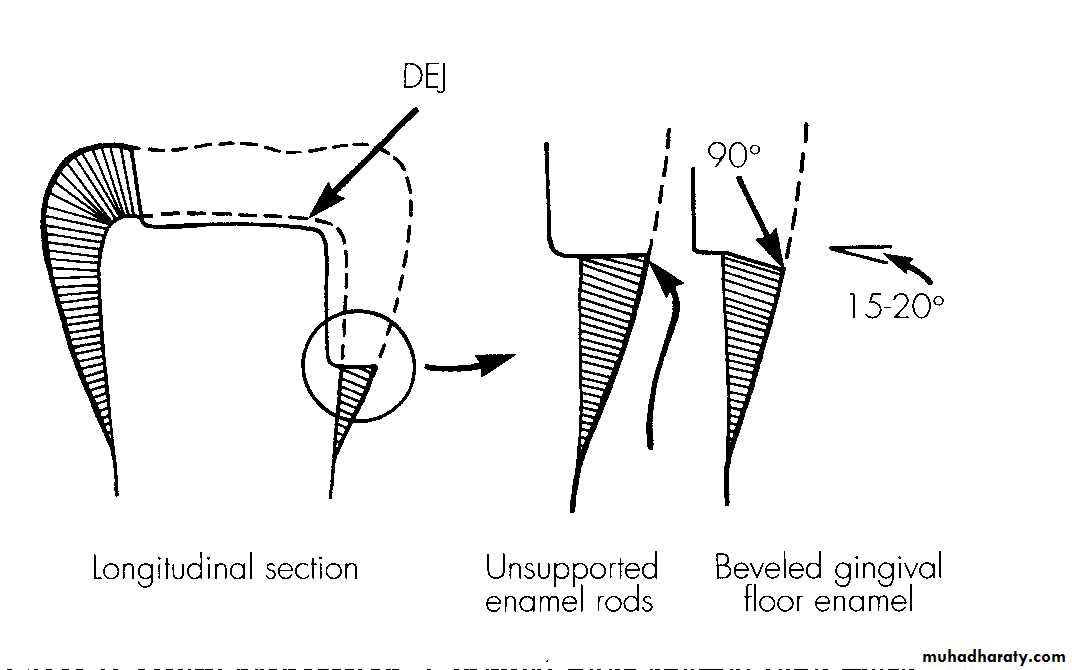
The strongest enamel margin is that margin
which is composed of full-length enamel rodsthat are supported on the cavity side by shorter
enamel rods, all of which extend to sound dentin.
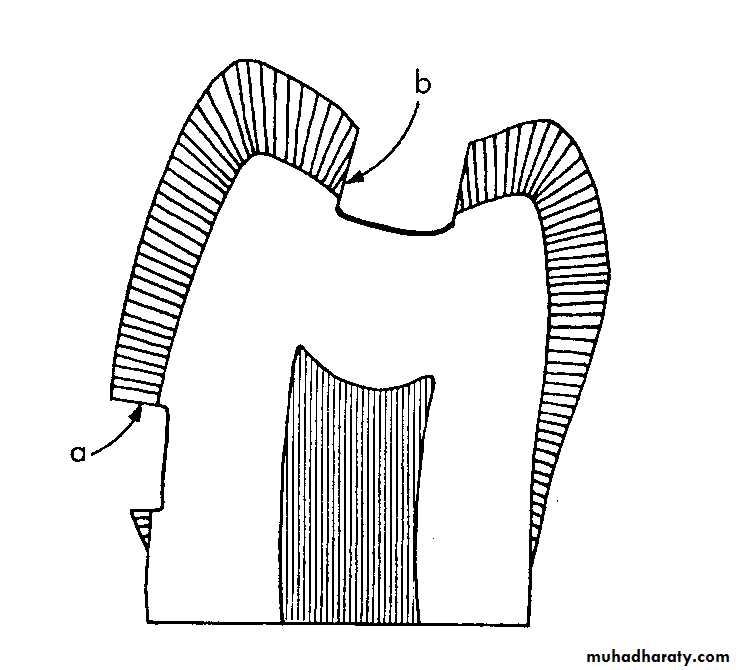
Finishing the external walls Ⅲ
The design of the cavosurface angle
The degree of smoothness of the wall
The design of the cavosurface angle:
depending on the materialamalgam: 90°
composite: beveling 30°~ 40°
Final cavity preparation stage
Step 5 Removal of any remaining infecteddentin if indicated
Step 6 Pulp protection
Step 7 Secondary resistance & retention form
Step 8 Procedure for finishing external walls
Step 9 Final procedures
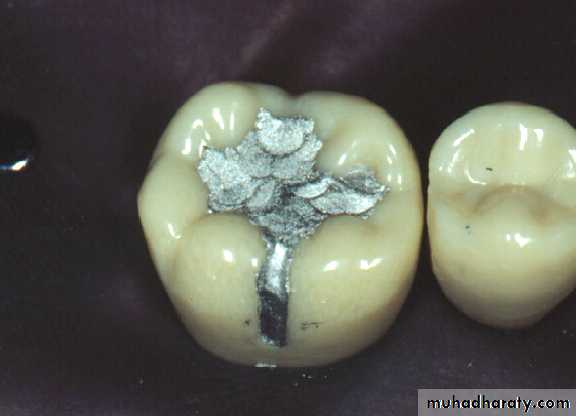
Final procedures
cleaninginspecting
varnishing
conditioning

Cavity preparation
Matrix applicationPreparation of materials
Insertion and carving of materials
Finishing and Polishing
Program of Operative Treatment
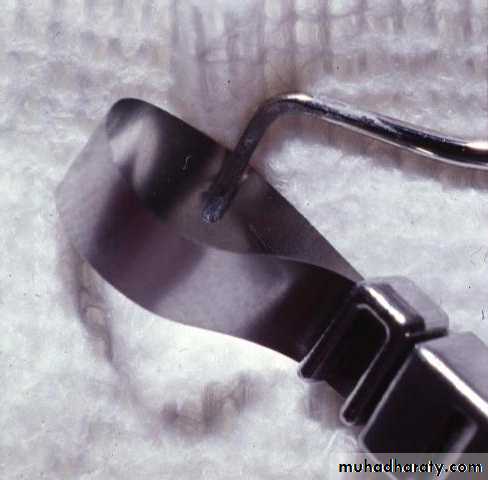
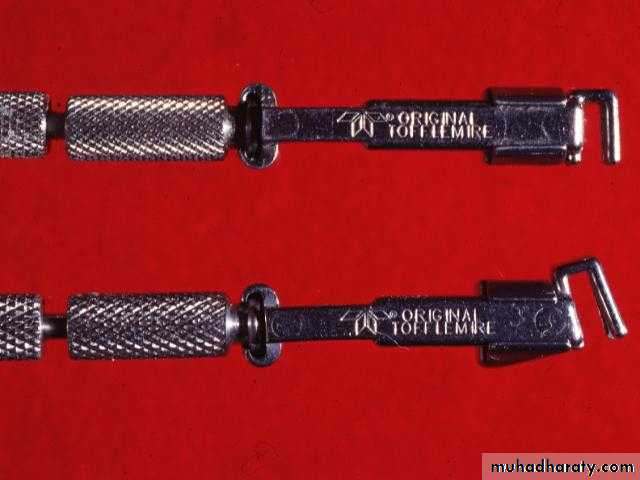
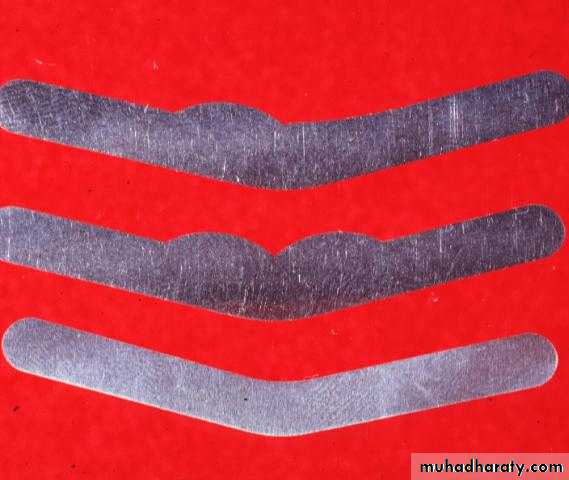
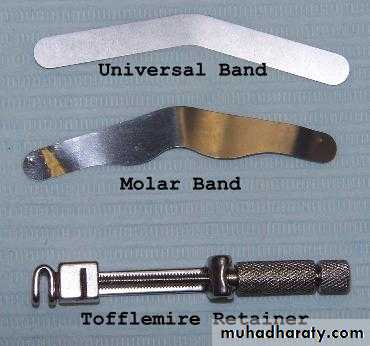
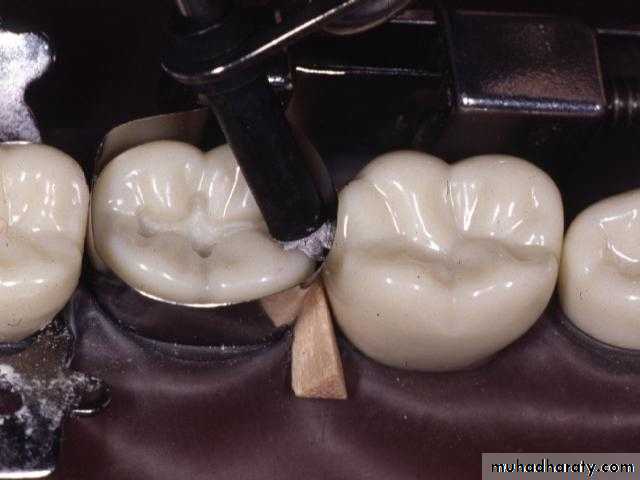
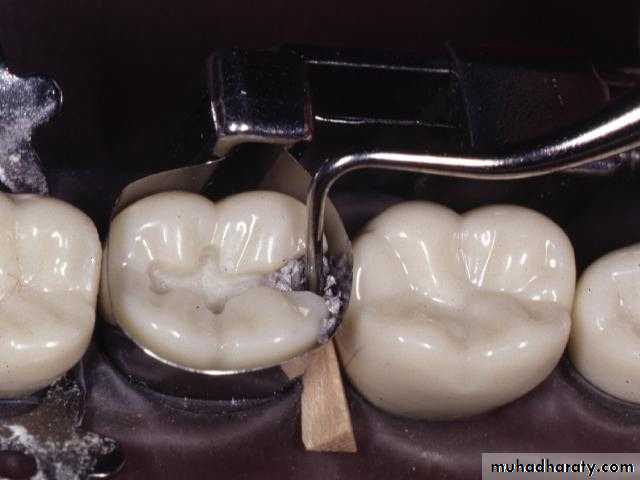
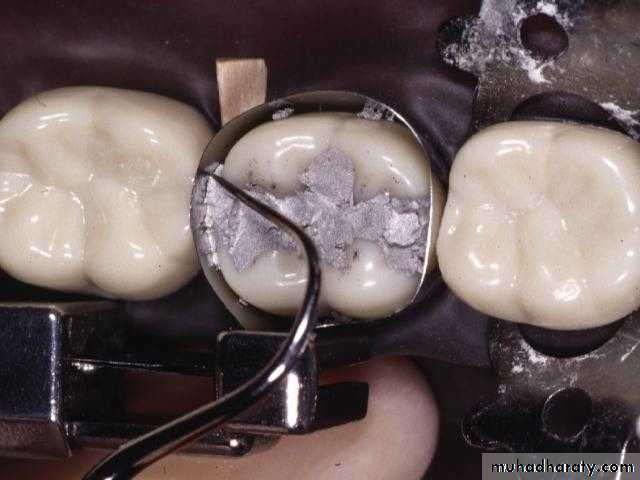
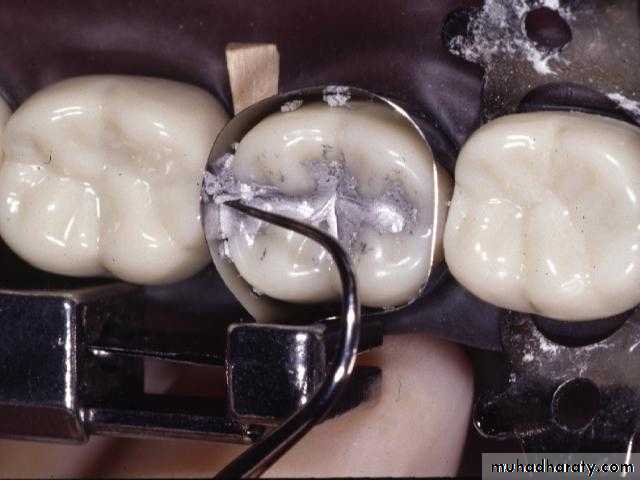
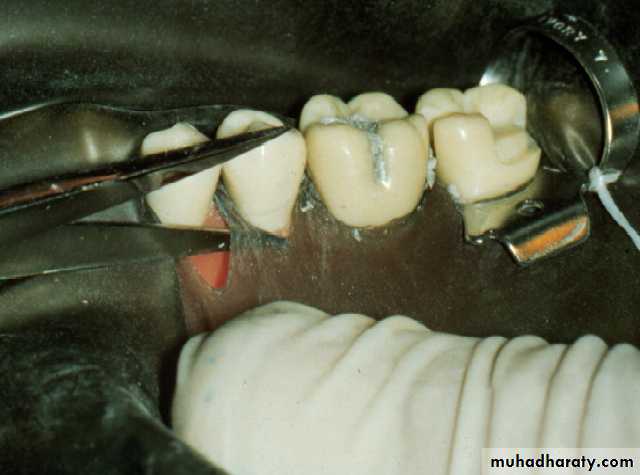
Matrix ApplicationTofflemire Matrix System
Ivory Matrix System
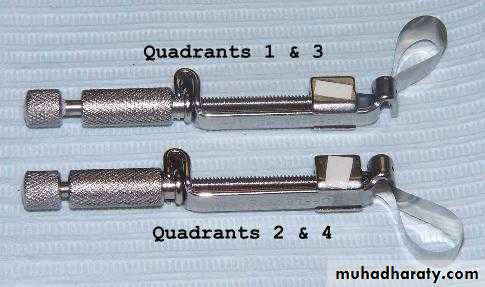
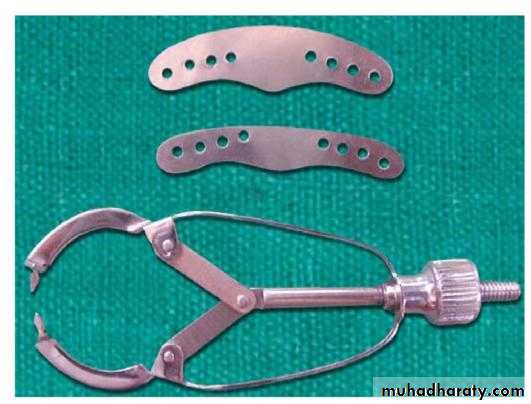
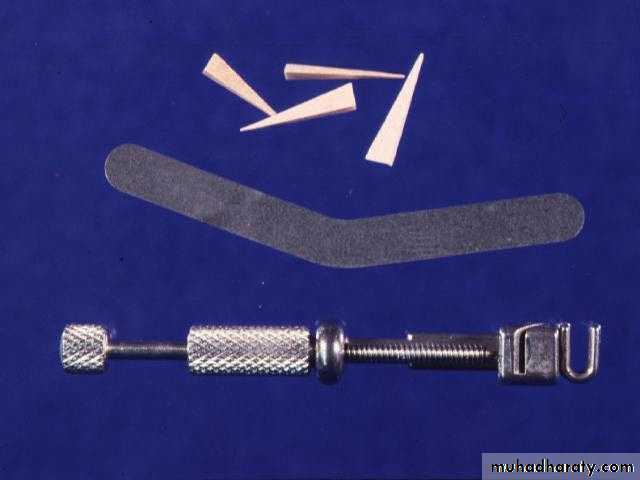
Matrix retainer, Band & Wedge
Contour Matrix
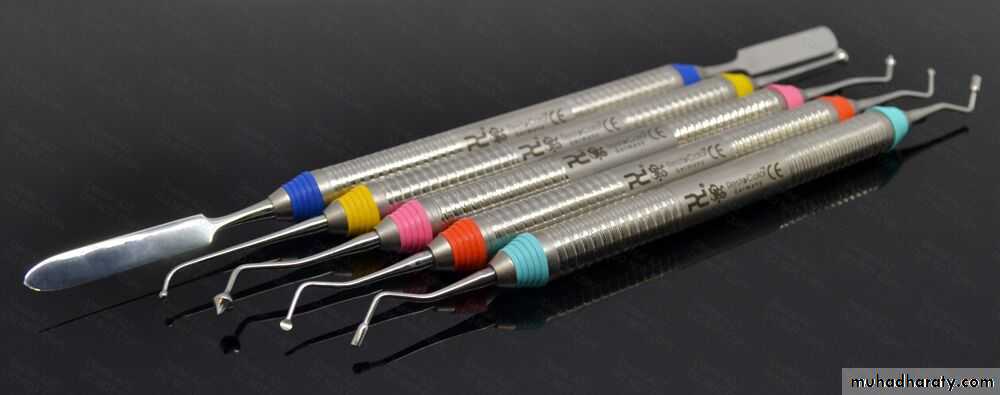
Rounded instrumentsuch as a spoon
excavator
Matrix in Retainer
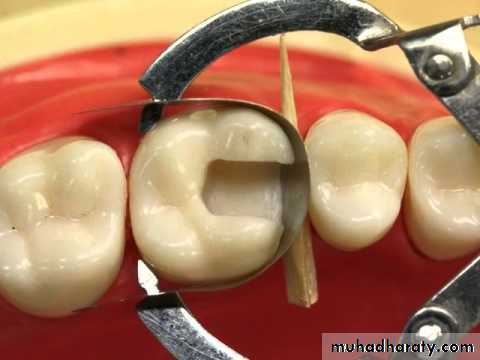
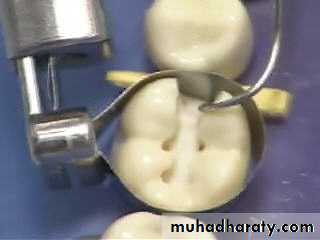
Matrix on Tooth
Occlusal View
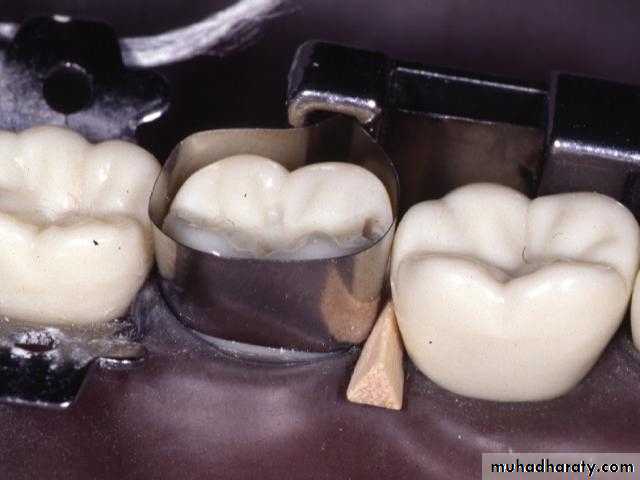
Wedge place
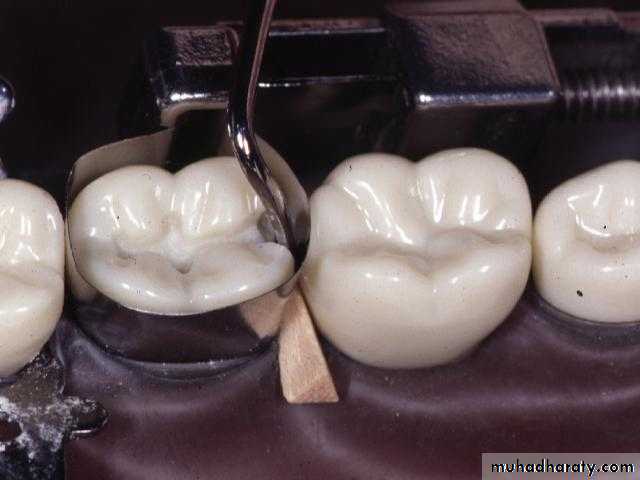
Contour Band

Ready for restoration
Cavity preparationMatrix application
Preparation of materials
Insertion and carving of materials
Finishing and Polishing
Program of Operative Treatment
Program of Operative Treatment
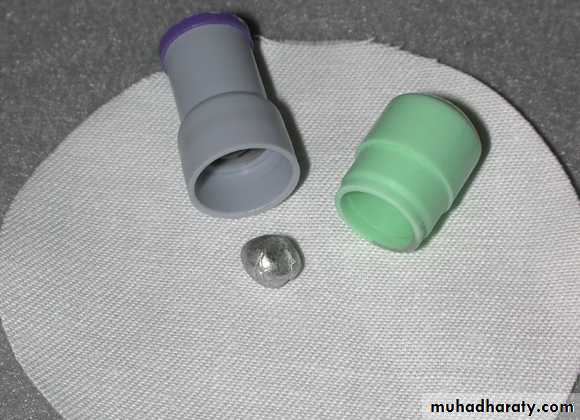
Amalgam Capsule
Amalgamator
Squeeze Cloth
Amalgam carrier
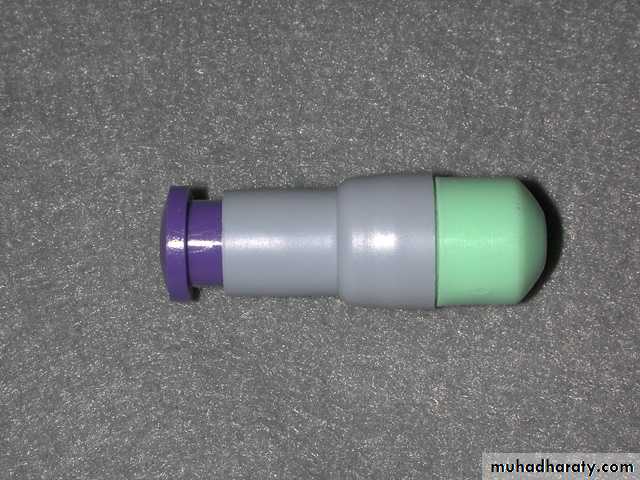
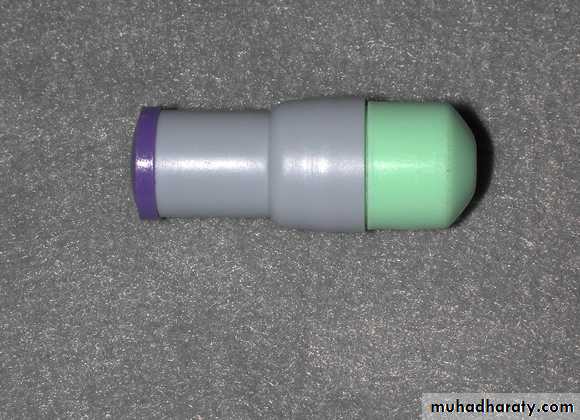
Activate Mercury
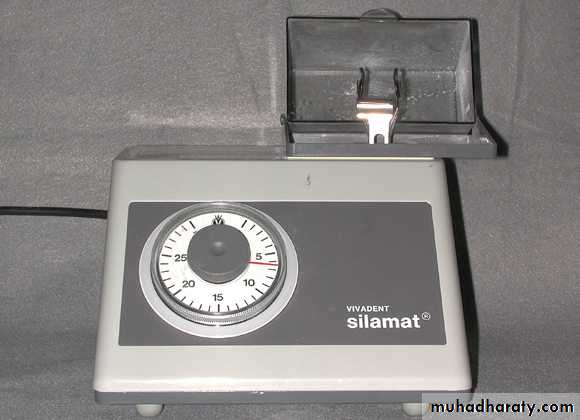
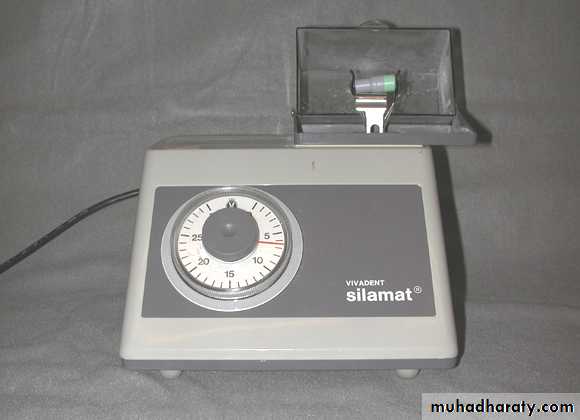
Amalgamator


Amalgam carrier
Squeeze Cloth
Amalgam carrier
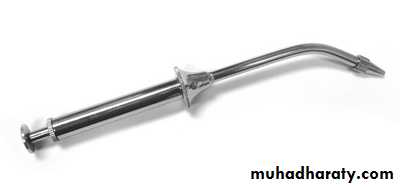
Amalgam plugger
Cavity preparationMatrix application
Preparation of materials
Insertion and carving of materials
Finishing and Polishing
Program of Operative Treatment
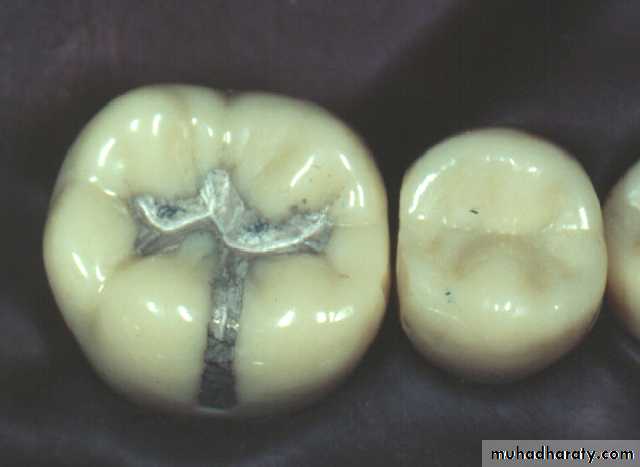
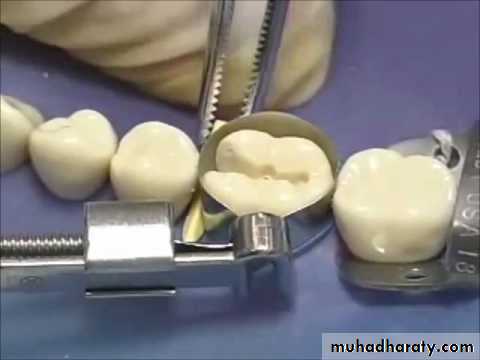
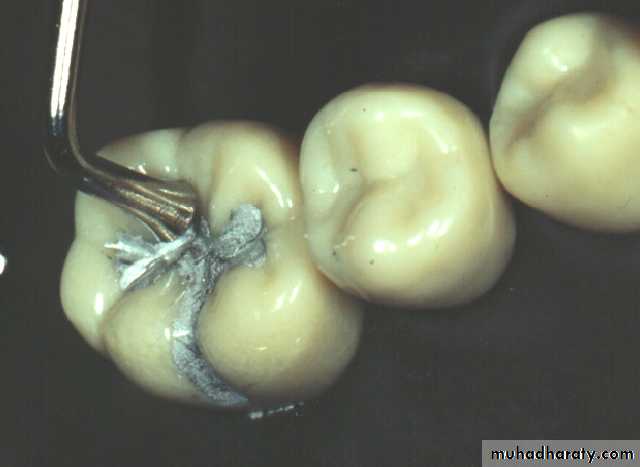
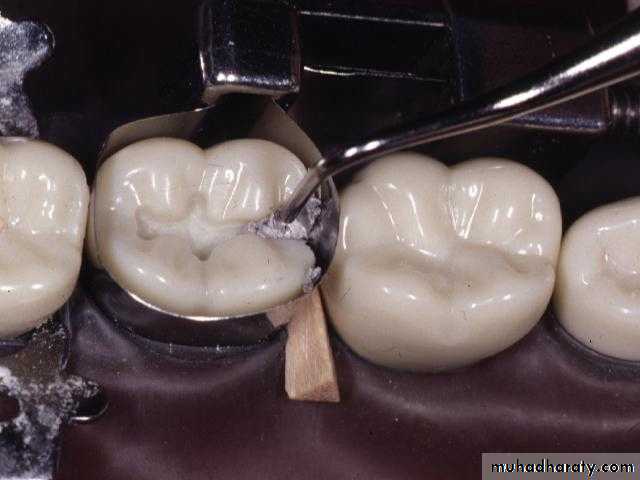
Insertion and carving
Class ⅡClass I
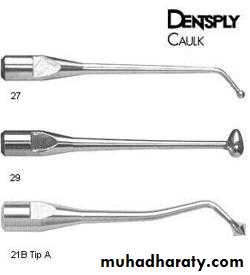
Amalgam Restorative Instruments
Amalgam CondensersAnatomic Burnishers
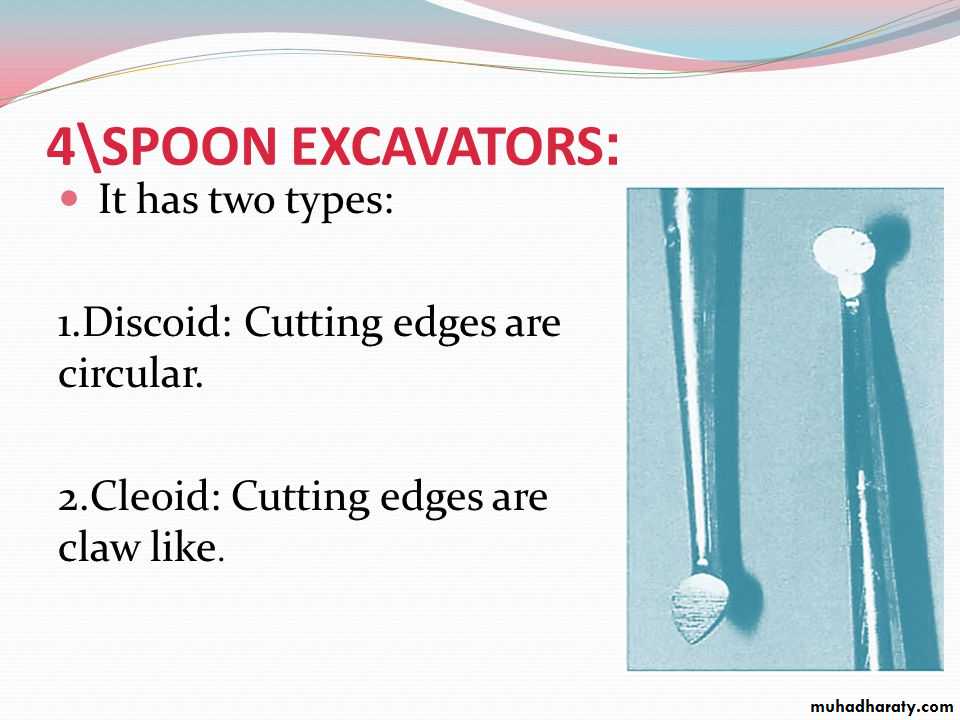
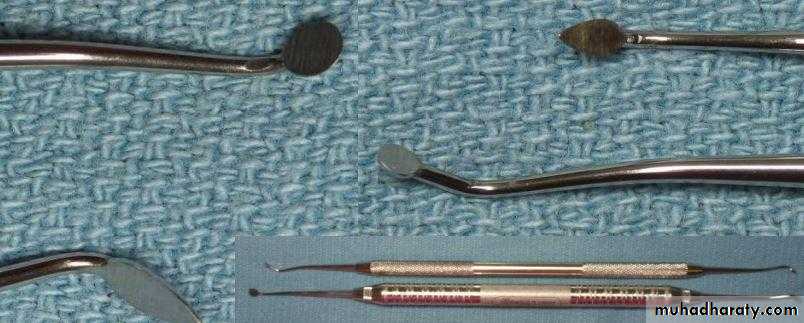
CarversCleoid or Discoid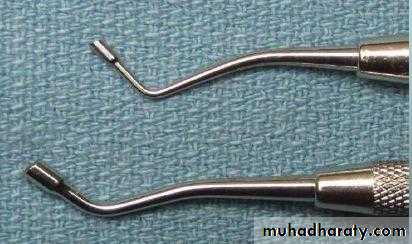
Check condenser fit
First increment
Start with the smallest condenser
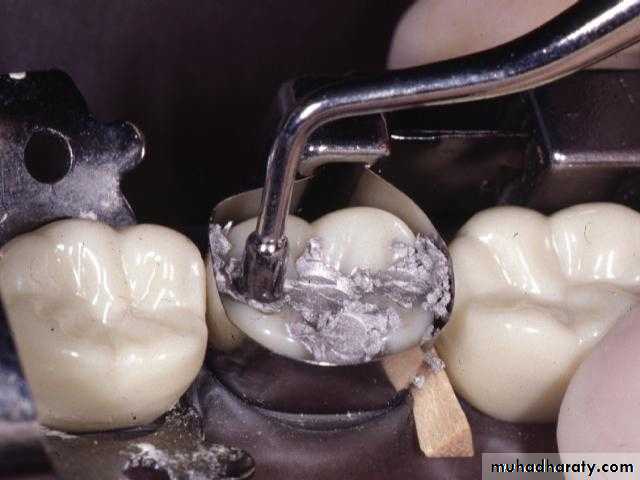
Step condenser over mass
Continue adding increment
Condense toward walls
Use alternative instruments
Overpacked
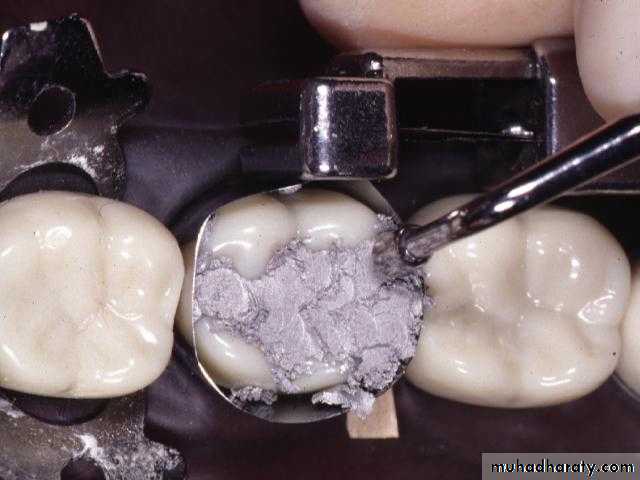
Create initial grooves

Create initial grooves
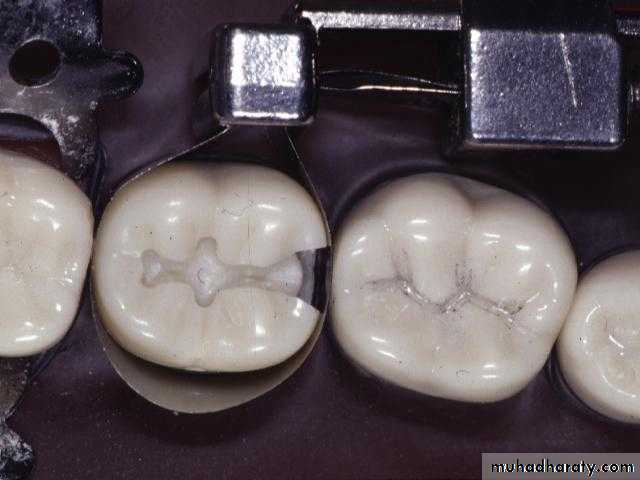
Carve to margin
Enhance grooves
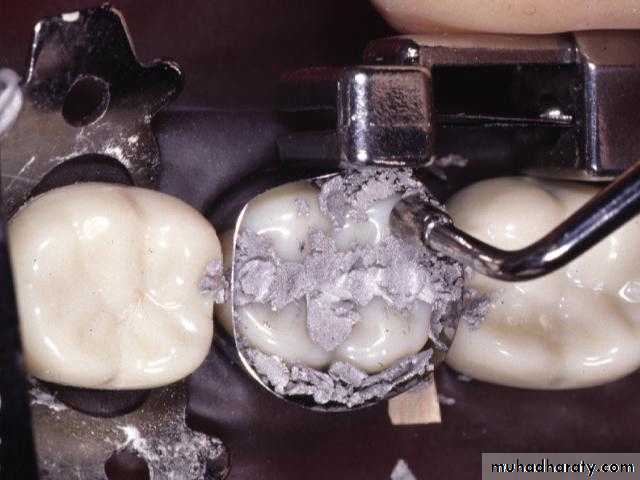
Remove flash
Final shape and burnishing
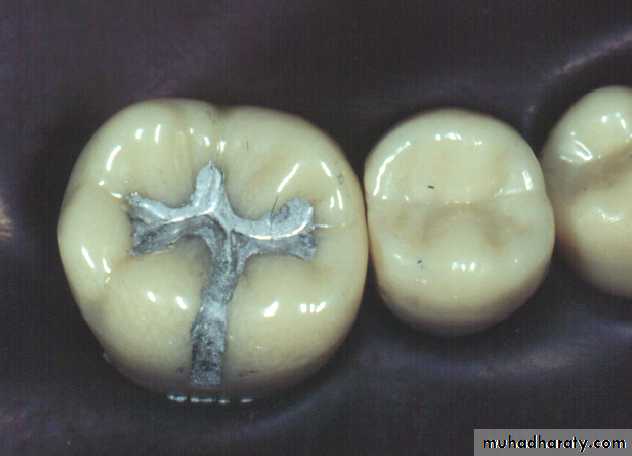
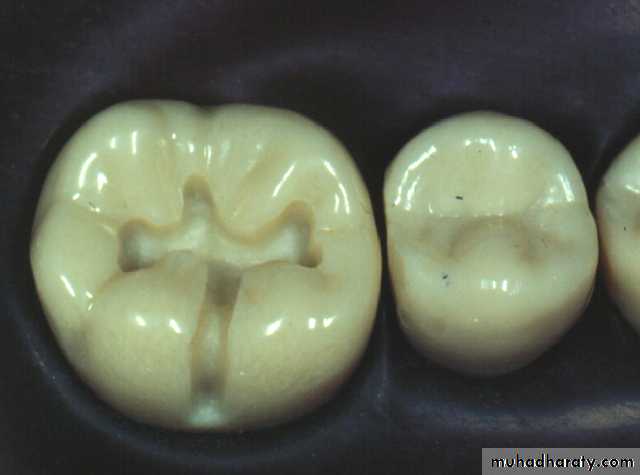
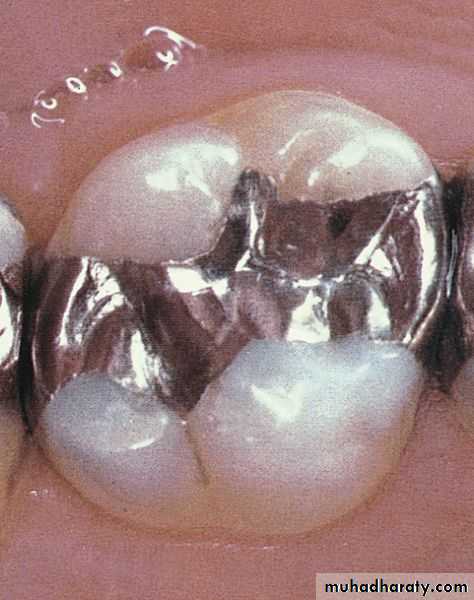
Completed restoration
Initial Increment
Initial Condensation
Lateral Condensation
Lateral Condensation
Overpacking
Marginal Ridge Condensation
Condense to Margins
Create Occlusal Embrasure
Occlusal Embrasure
Occlusal Embrasure
Occlusal Embrasure
Removing Ridge
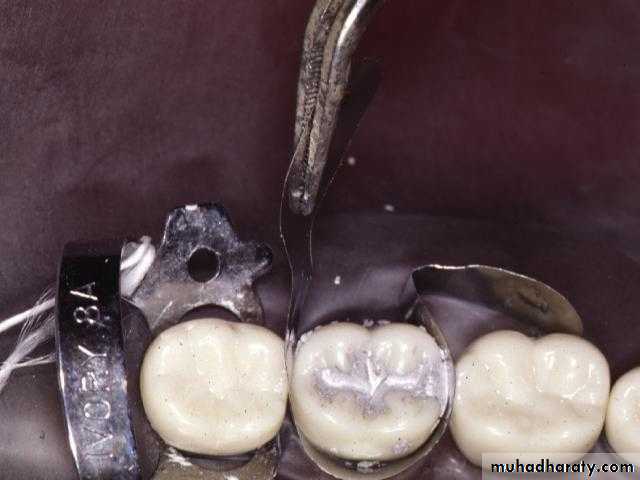
Removing Band
Flash & Excess
Check with interproximal carve
Instrument on Tooth Structure

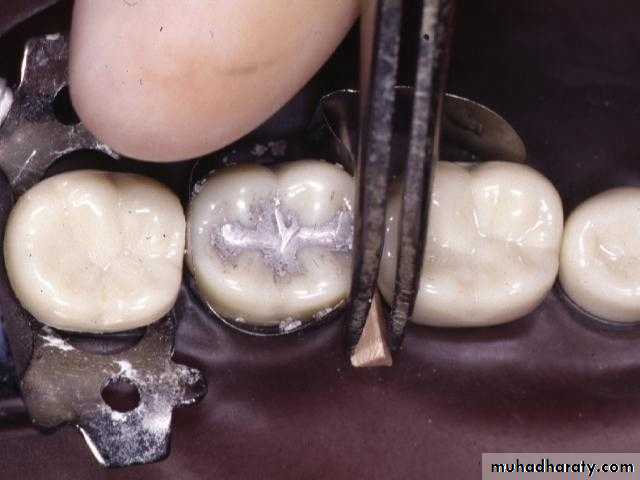
Completed Restoration
Rubber dam removal
Cavity preparation
Matrix applicationPreparation of materials
Insertion and carving of materials
Finishing and Polishing
Program of Operative Treatment

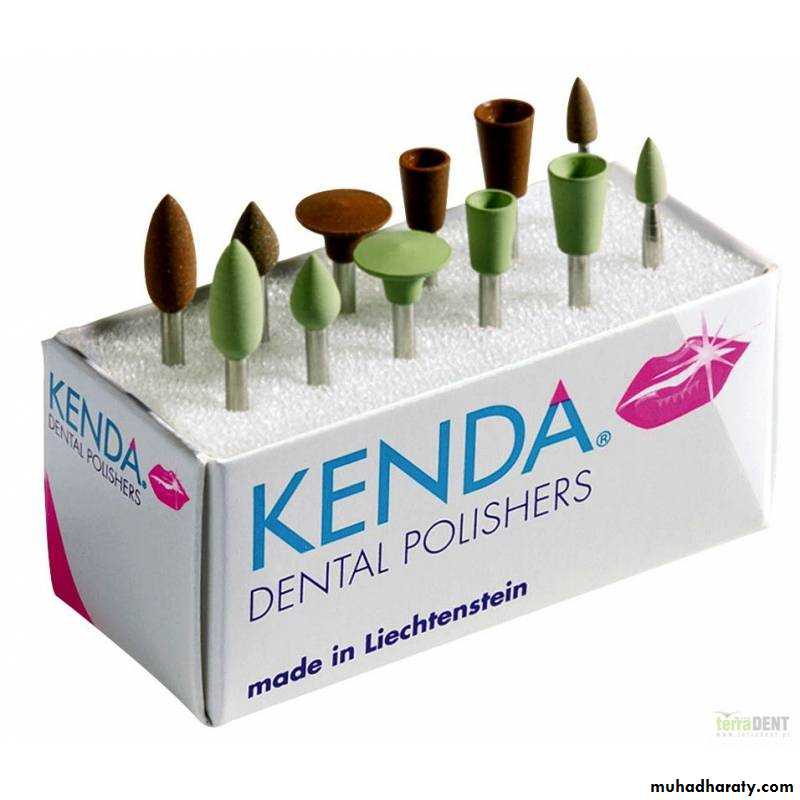
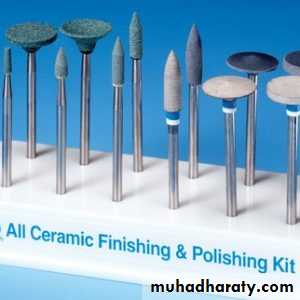
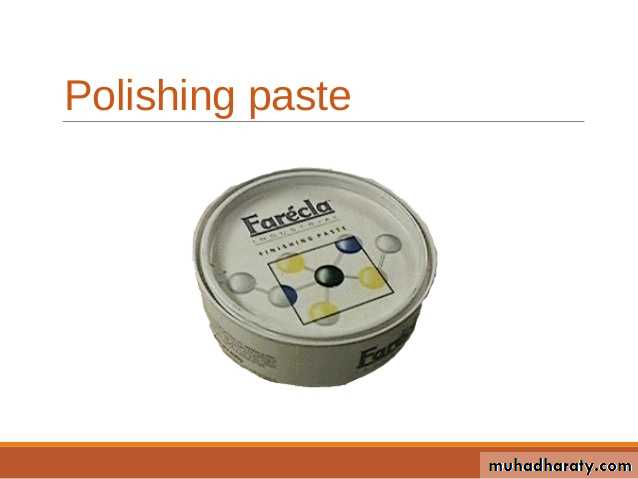
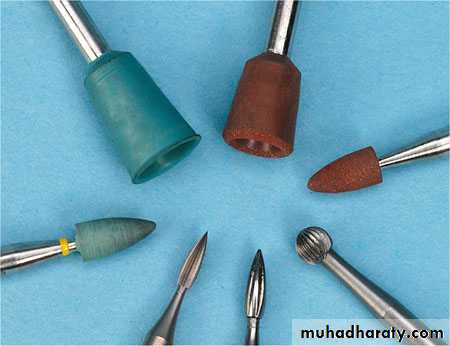
Polishing kit
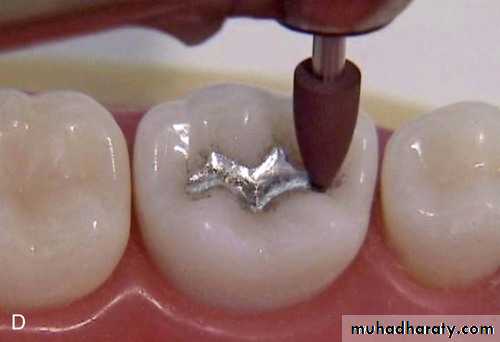
Polishing
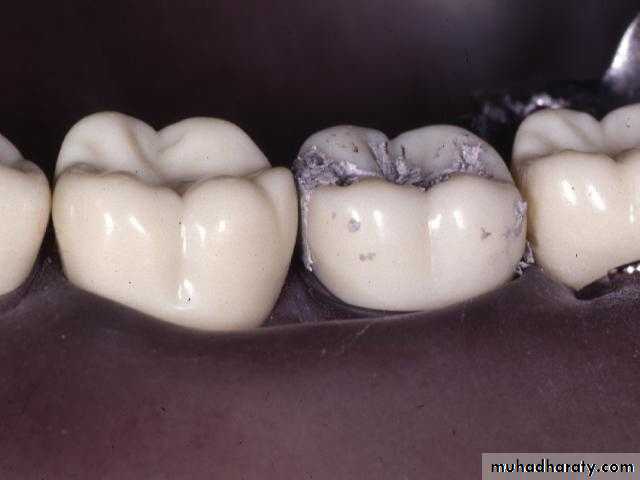
Evaluate the restoration Class IVerify that cavosurface margin can be seen
Flash
Underfilled
Voids
Check the overall shape of the anatomy
Look for bulky ridges that might be high
in occlusion
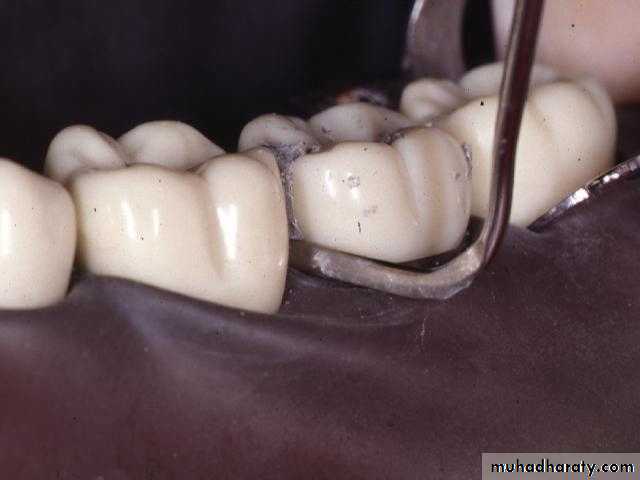
Evaluate the restoration Class II
Check proximal contact
Check flash and overhangs proximally
Check underfill proximally
Check outline form
Check Occlusion
Evaluate carefully with marking paperor ribbon in Miller forceps
Check gently in centric occlusion
Check all excursive movement
How to Place Matrix Band in Tofflemire Retainer

Tofflemire retainer with Matrix band placement on Tooth
matrix