34
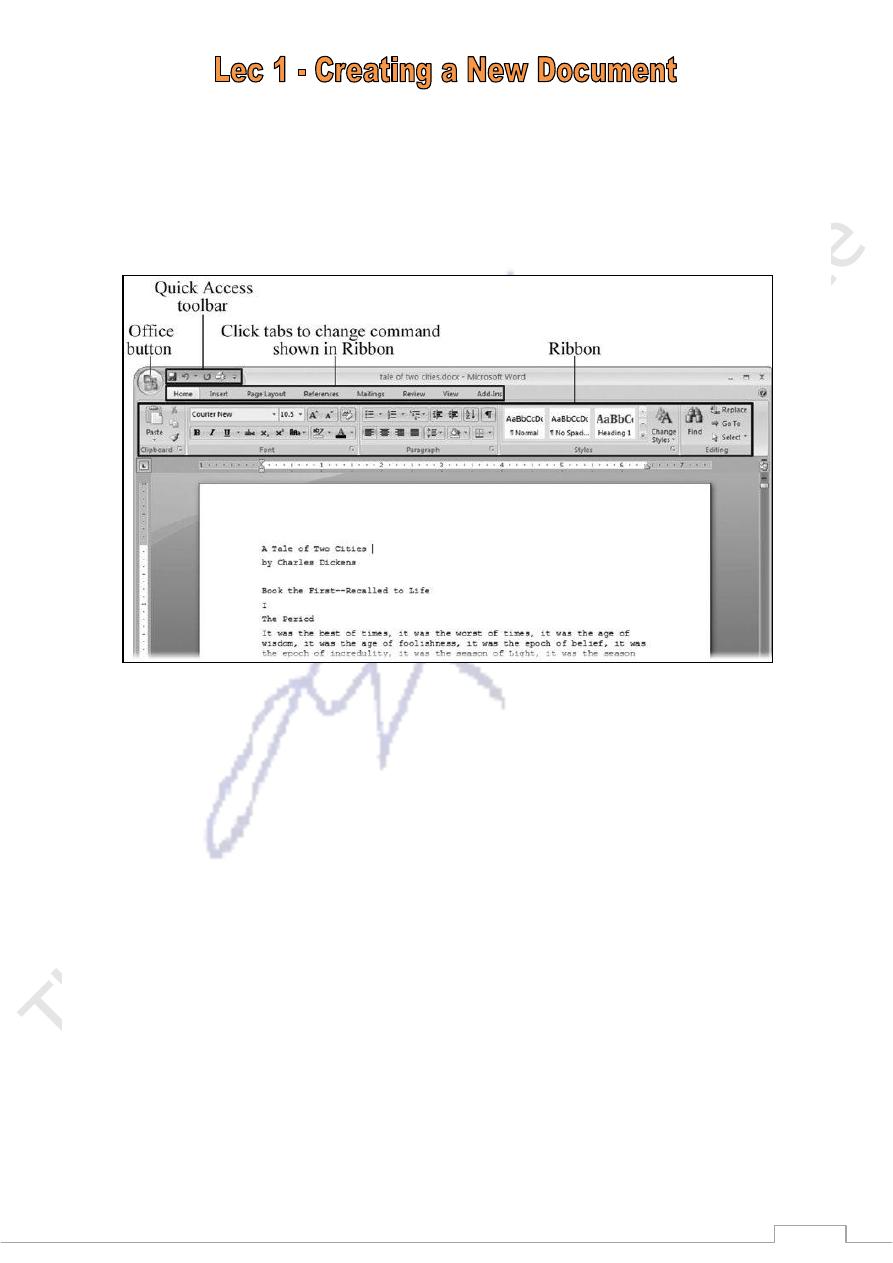
When you start Word without opening an existing document, the program gives you an empty one to work
in. If you're eager to put words to page, then type away. Sooner or later, though, you'll want to start another
new document. Word gives you three ways to do so:
Creating a New Blank Document
Say you want a new blank document, just like the one Word shows you when you start the program. No
problem here are the steps:
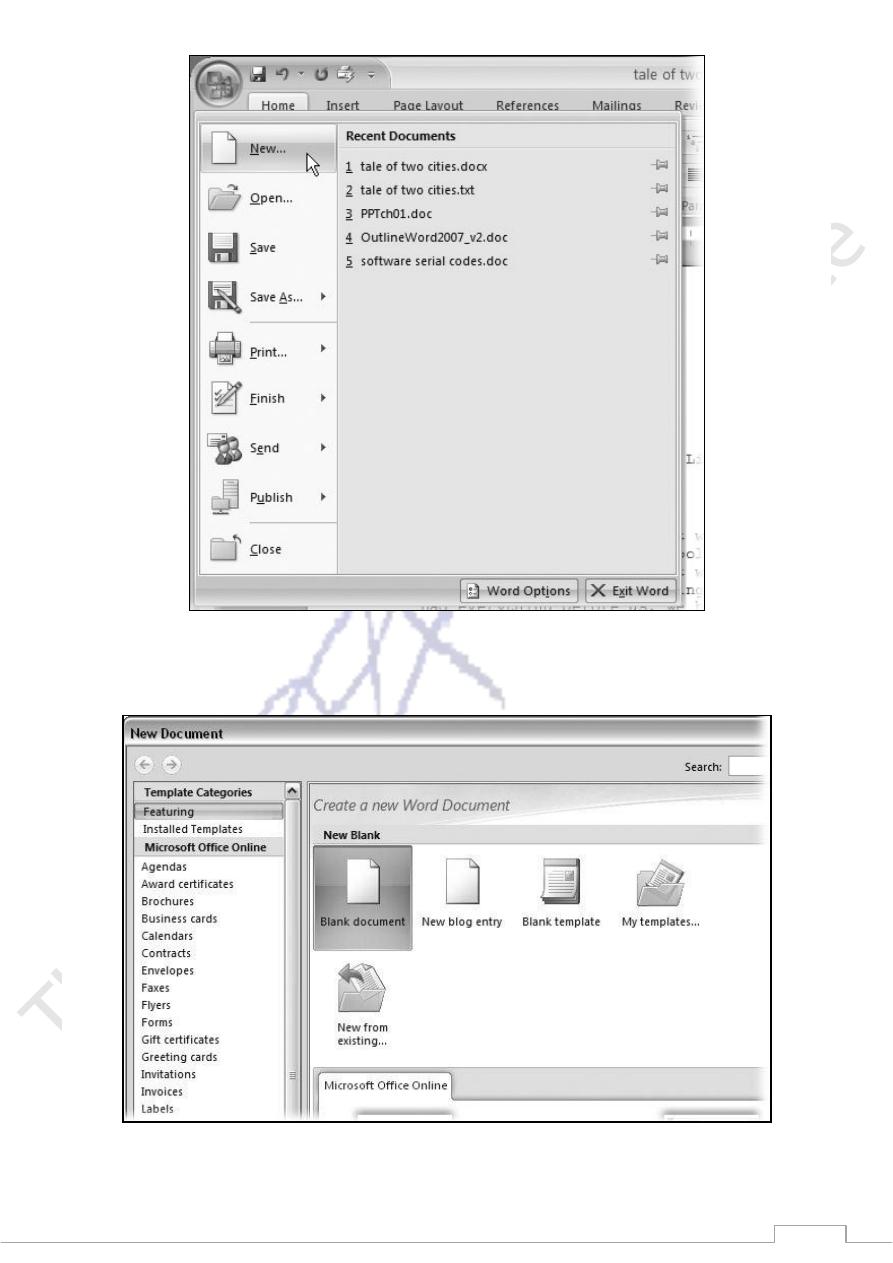
1. Choose Office button
New.
The New Document dialog box appears.
2. In the upper-left corner of the large "Create a new Word document" panel, click "Blank document"
3. The New Document box presents a seemingly endless number of options, but don't panic. The
"Blank document" option you want is on the left side of the first line.
4. At the bottom of the New Document dialog box, click Create.
The dialog box disappears, and you're gazing at the blank page of a new Word document.
35
36
Creating a New Document from an Existing Document
.
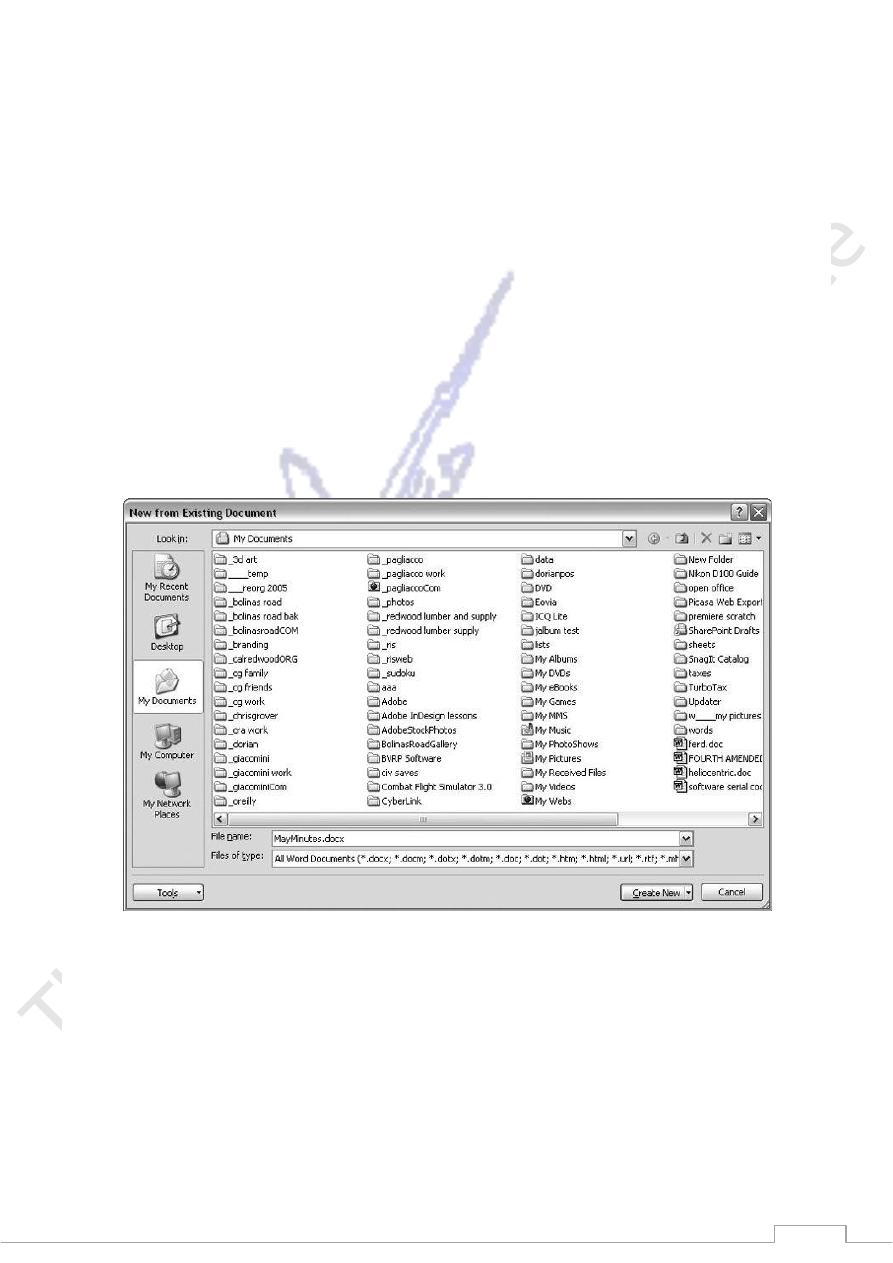
1. Choose Office button to open the New Document window. Then click "New from existing…" (it
sits directly below the "Blank document" button).
The three dots at the end of the button's title tell you that there's another dialog box to come. And
sure enough, when you click "New from existing…", it opens another box, appropriately titled New
from Existing Document . This box looks and works like a standard Windows Open File box. It lets
you navigate to a specific folder and open a file.
2. On your computer, find the existing document you're using for a model.
You can use the bar on the left to change the folder view. Word starts you in your My Documents
folder, but you can switch to your desktop or your My Computer icon by clicking the icons on the
left. Double-click folder icons in the large window to open them and see their contents.
3. Click to select the file, and then click Create New (in the lower-right corner). (Alternatively, just
double-click the file's icon to open it. This trick works in all Open File boxes.)
Entering and Editing Text
Whenever you're entering text into Word, the insertion point is where all the action takes place. Press Shift
to type capitals or to enter the various punctuation marks you see above the numbers keys (!@#$*&^).
The Backspace key and the Delete key both erase characters, but there's a difference: The Backspace erases
the characters behind the insertion point, while the Delete key eliminates characters in front.

37
Selecting Text
Select individual characters. Click to place the insertion point at the beginning of the text you want to
select. Press and hold the left mouse button and drag over the characters. As you drag, the characters
you select are highlighted to indicate they're part of the selection .
Select a word. Double-click the word. The entire word's highlighted.
Select a sentence. Ctrl-click the sentence. The entire sentence is highlighted.
Select a line of text. Move the cursor into the left margin. The cursor changes to an arrow. Click right
next to the line you want to select. The line's highlighted, showing that it's selected.
Select a whole paragraph. Move the cursor into the left margin. When it changes into an arrow,
double-click next to the paragraph. The entire paragraph is highlighted. To add more paragraphs,
keep your finger on the mouse button and drag until the cursor points at another paragraph, and
another….
Select a block of text. Click to place the insertion point at the beginning of the block you want to
select. (No need to keep pressing the mouse button.) Hold the Shift key down, and then click at the
other end of the selection. The block of text is highlighted.
Select an entire document. Move the cursor into the left margin, so that it changes into an arrow.
Click the left mouse button three times. Your entire document's highlighted.
Cutting, Copying, and Pasting
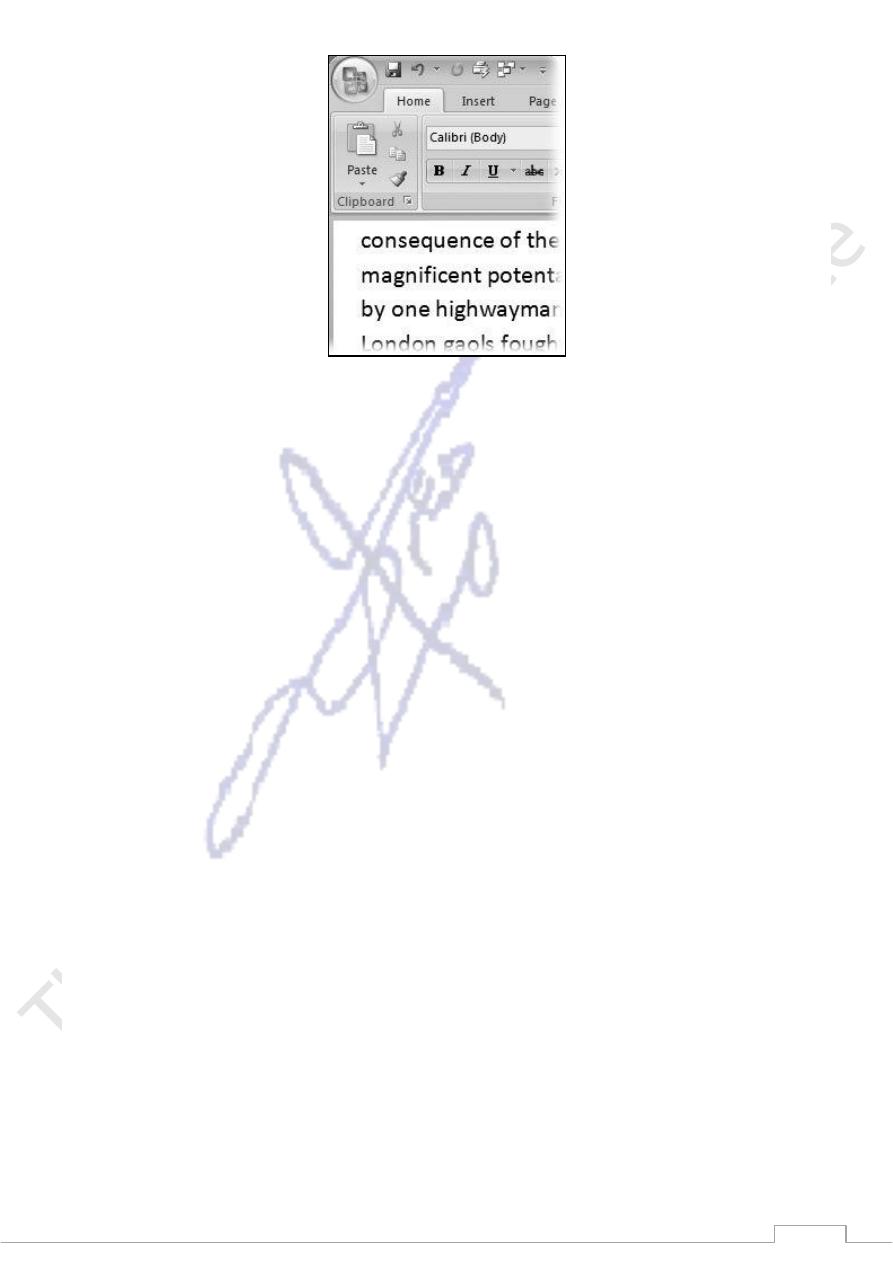
Word's new ribbon is where all the commands live, and it's hardly a surprise that cut, copy, and paste
are the first commands on the first tab (Home) in the first group (Clipboard). As you can see in
Figure, these commands are conveniently located right near another place you frequently mouse over
to, the Office button.
38
Cut (Home ,Clipboard ,Cut). Again, you need to select text (or an object, like a picture or a table)
before you can cut it from your document. When you invoke the Cut command, your selected item
disappears, but Cut is very different from a Delete or a Clear command. The Cut command actually
stores the cut item on the Office Clipboard, where you can bring it back later using the Paste
command. You can actually open this Clipboard and see recently cut and copied items. The Office
Clipboard works across all Microsoft Office programs, so you can cut a paragraph from your novel
and paste it into an Outlook email or PowerPoint slide.
Copy (Home ,Clipboard ,Copy). As you may expect, Copy makes a duplicate of the selected text or
object and stores it on the Clipboard. It leaves the selection in place in its original location.
Paste (Home ,Clipboard ,Paste). Before you use the Paste command, you must first cut or copy some
text (or a picture or other object). Then, put the insertion point exactly where you want to place the
item, and then paste away.
Editing with Keyboard Shortcuts
The keyboard shortcuts are the quickest and easiest editing commands to use as you're typing along, because
you don't need to take your hands off the keyboard. You can use the Cut, Copy, and Paste commands with
only a couple fingers of the left hand. These shortcuts use the Ctrl key in combination with nearby keys on
the bottom row X, C, and V. As an added bonus, the adjacent Z key is used for the Undo command another
oft-used editor's tool. These keys perform the exact same functions as the ones run when you use the ribbon
commands using Word's ribbon:
Cut. Ctrl+X.
Copy. Ctrl+C.
Paste. Ctrl+V.
Undo. Ctrl+Z.
Editing with the Mouse
1 Click (the left mouse button) and drag to select the text that you want to relocate.
Word highlights the text to show you what you've selected. Let go of the mouse button when you're
done.
39
2 Click the selected text and, holding down the mouse button, drag the mouse to the new location for the
text.
3 Release the mouse button.
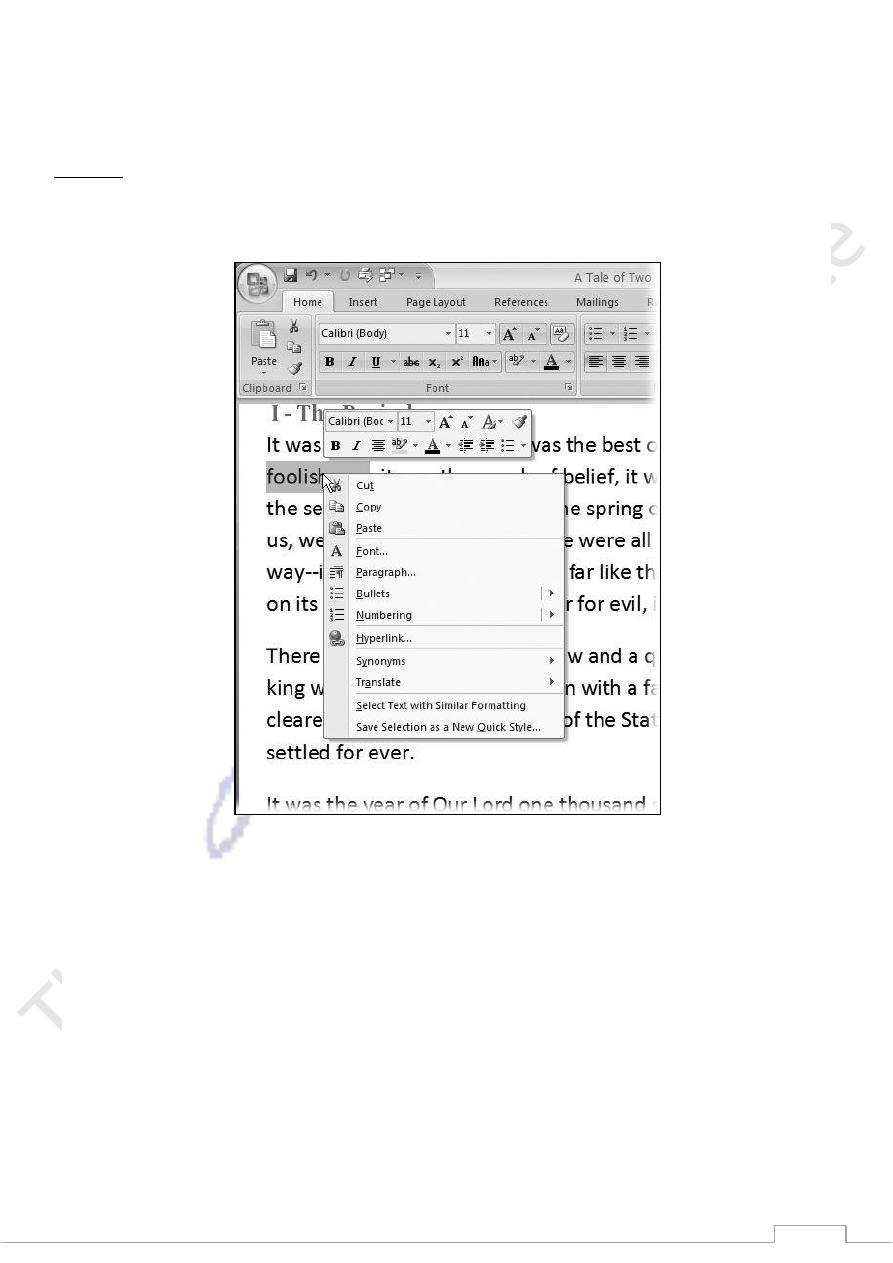
Note that
When you right-click, you get a pop-up menu that includes Cut, Copy, Paste, and other commands, right where
you need them.
Finding and Replacing Text
Scanning every word of your 400-page novel to find the exact spot where you first mentioned Madame
DeFarge is drudgery with a capital D. Fortunately, Word performs this task quickly and without whining or
demanding overtime pay.
1. Open the Replace dialog box . For example, press Ctrl+H.
You have many ways to open the Replace dialog box, as explained : if your hands are on the
keyboard, then Ctrl+H is the fastest.
When the dialog box opens, you see tabs at the top for each of the panels: Find, Replace, and Go To.
The controls and options under the Find and Replace tabs are nearly identical. The main difference is
that the Replace tab includes two text boxes"Replace with" as well as "Find what."
41
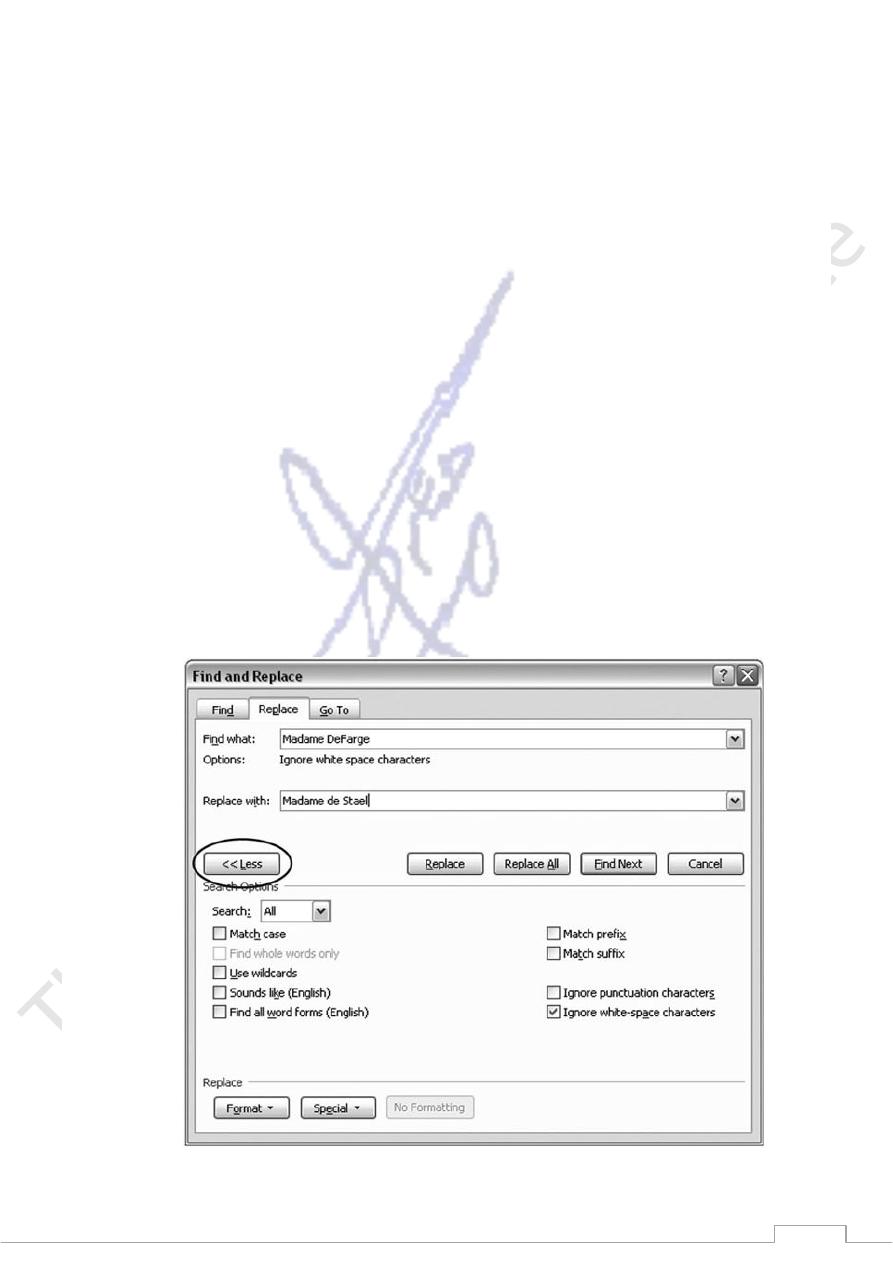
2. In the "Find what" box, type the text you want to find, and, in the "Replace with" box, type the
replacement text.
For example, type Madame DeFarge in "Find what" and Madame de Stael in "Replace with."
3. If you wish, click More to reveal additional Find options.
When you click More, the box expands, and you see a number of additional controls that can fine-
tune your search. For example, if you're searching for "Madame DeFarge" but you don't know how
it's capitalized, then make sure the Match Case checkbox is turned off. That way, Word finds every
occurrence even if you didn't capitalize it the same way throughout. Click Find Next to begin your
search and replace mission.
The search begins at the insertion point, so if you want to find all the instances of Madame DeFarge,
start at the beginning of your document. A quick Ctrl+Home takes you there. Word finds the text and
highlights it in the document. If you need a better look at your text, you can click the top edge of the
Replace box and drag it to another position.
4. Examine the text and make sure you want to replace this instance of Madame DeFarge with Madame
de Stael. Click Replace, and the text is swapped.
Word automatically finds the next instance of your search text.
5. If you're certain that you want to replace every instance of Madame DeFarge, click Replace All.
Word makes all the changes and reports back with the number of replacements it made.